not inspecting the van

How much does it cost to run and maintain a campervan?

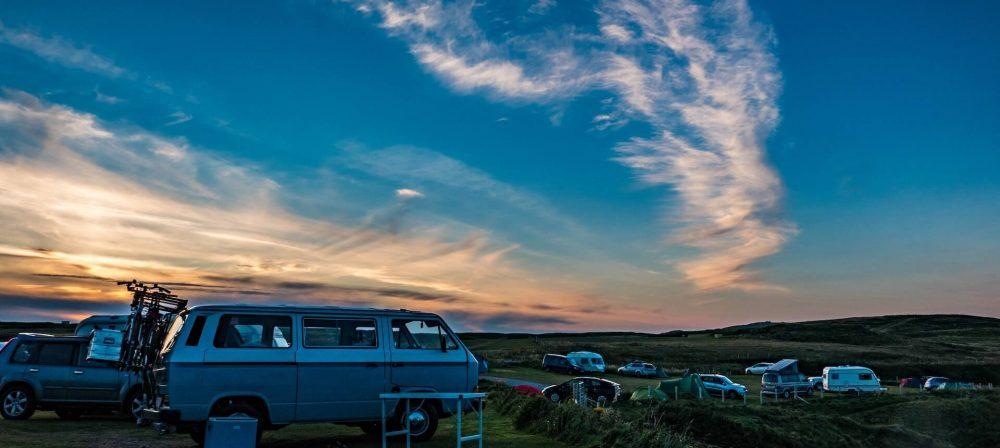
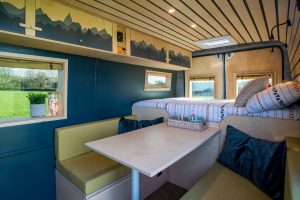
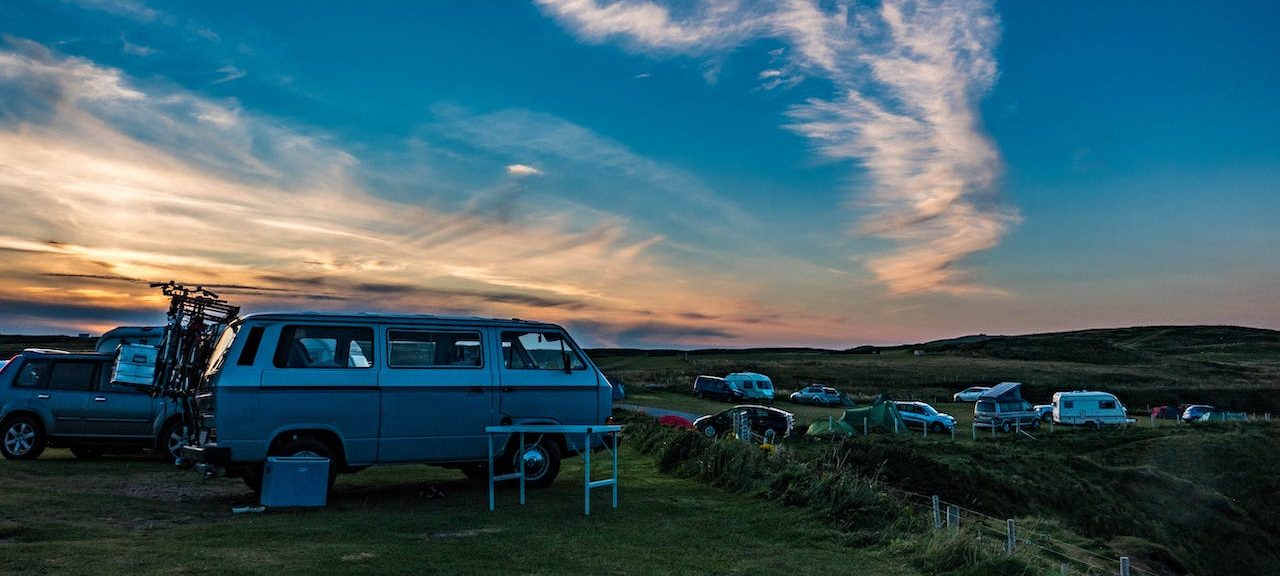
Travelling in a campervan is undoubtedly an adventure of a lifetime. The freedom to roam wherever the road leads, waking up to breathtaking views, and embracing a minimalist lifestyle are just a few perks. 

However, behind the allure of van life lies the reality of managing maintenance costs and daily living expenses. In this blog, we’ll dive into both aspects: campervan maintenance costs and the costs of running a van – to help you prepare for the journey ahead.


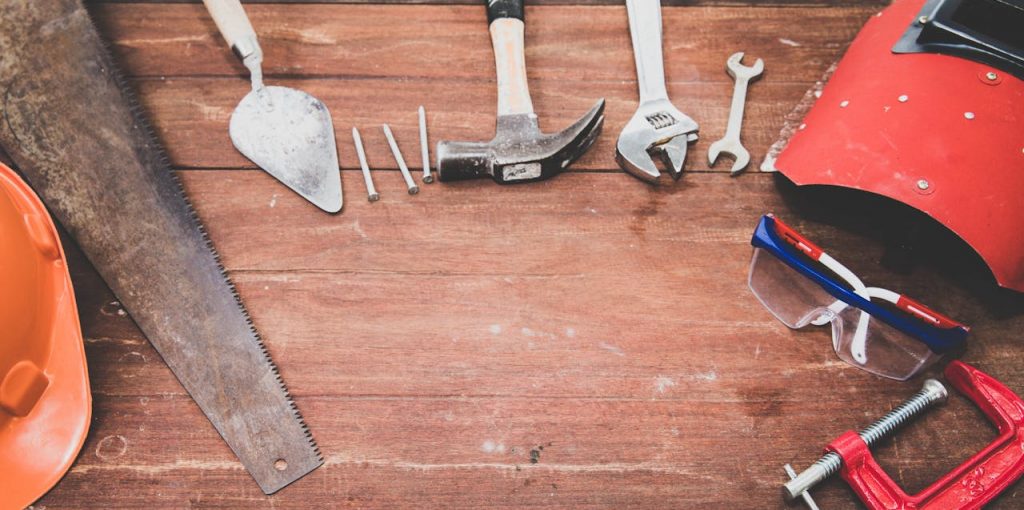
Campervan maintenance costs: keeping your home on wheels rolling

Owning a campervan comes with its fair share of maintenance responsibilities. Here are some key areas to consider:

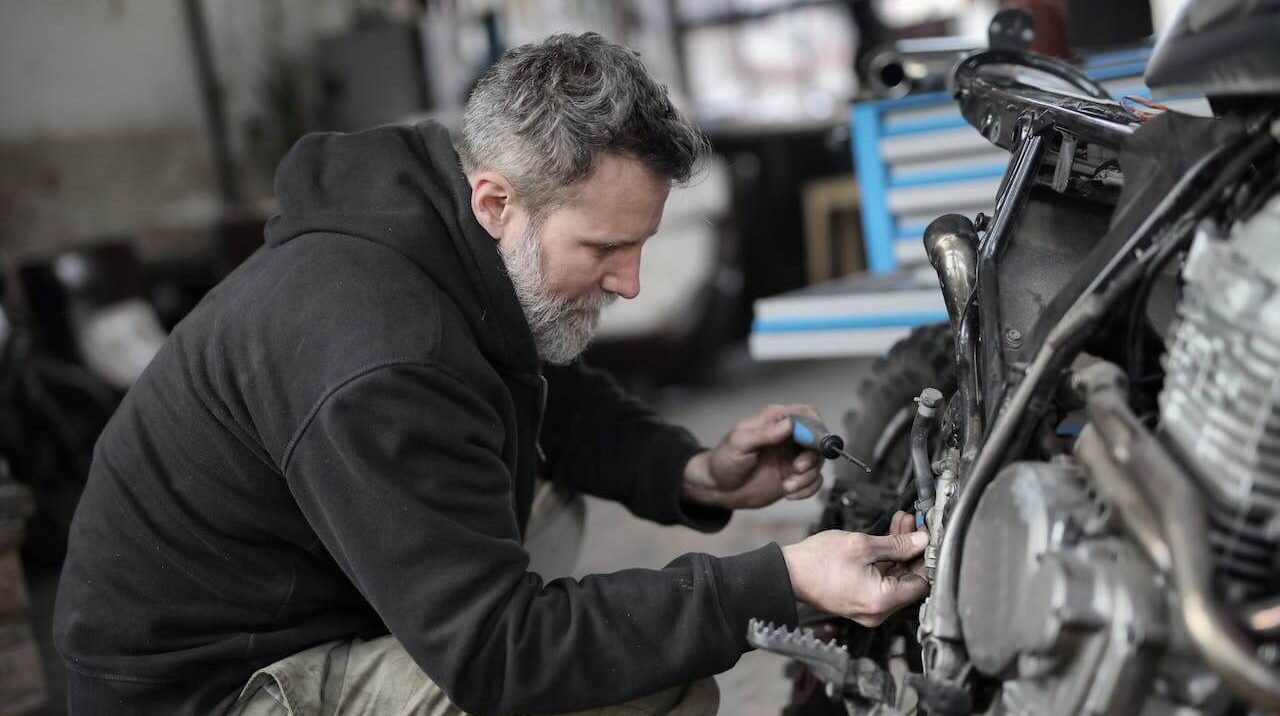
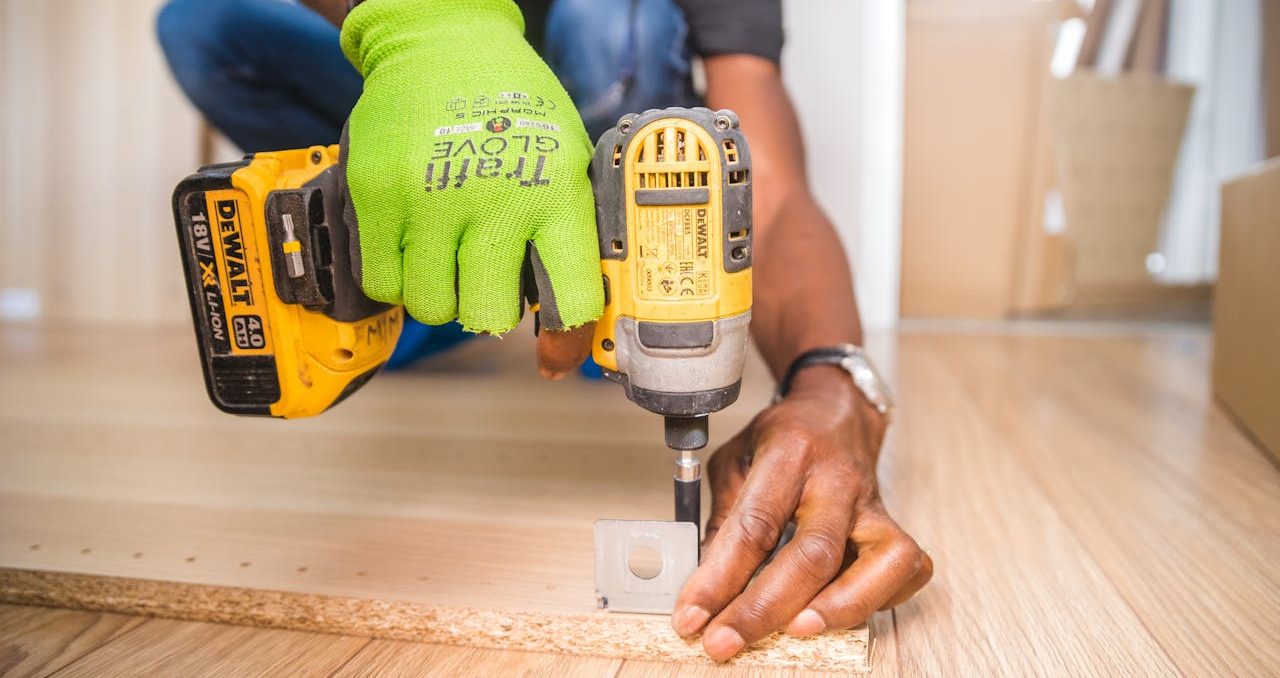
Mechanical maintenance

Like any vehicle, regular servicing of the engine, brakes, suspension, and other mechanical components is essential to ensure safe and reliable travel. The cost of a campervan MOT in the UK can vary depending on several factors, including the type of vehicle, its age, and the location of the MOT test centre. The average cost for a campervan MOT in the UK is around £45 to £55, which doesn’t factor in any potential repairs.

It’s also important to consider servicing, and there are several types of servicing options and costs to consider:

1. Interim service: An interim service typically includes essential checks and maintenance tasks such as oil and filter changes, fluid top-ups, visual inspections of components, and basic safety checks. The cost for an interim service for a campervan in the UK can range from £100 to £200, depending on the vehicle’s size and requirements.

2. Full service: A full service is a more comprehensive inspection that includes all the checks and tasks covered in an interim service, plus additional checks such as brake system inspection, steering and suspension checks, and more detailed component inspections. The cost for a full service for a campervan in the UK can range from £200 to £400 or more, depending on factors such as the vehicle’s size, age, and any additional services included.

3. Major service: A major service is typically recommended at longer intervals and includes all the checks and tasks covered in a full service, along with additional inspections and maintenance tasks such as replacing spark plugs, checking and adjusting timing belts, and more extensive component inspections. The cost for a major service for a campervan in the UK can range from £300 to £600 or more, depending on the vehicle’s requirements and any additional services included.


Habitation maintenance

Campervans are not just vehicles; they’re also your home on wheels. Habitation maintenance includes servicing appliances, checking the plumbing system, inspecting the electrical wiring, and ensuring the structural integrity of the living space. Allocate funds for repairs or replacements of appliances, as well as inspections to catch potential issues early.

1. Appliance servicing: Campervans often have refrigerators, stoves, heaters, and water heaters. Servicing these appliances typically involves cleaning, inspecting, and testing them to ensure they function correctly. The cost of appliance servicing can vary depending on the type and number of appliances and any repairs or replacements needed. On average, expect to pay between £50 to £150 per appliance for servicing, excluding additional parts or repairs.

2. Plumbing system maintenance: Campervans with onboard water systems require regular maintenance to ensure proper functioning and prevent leaks or damage. This may include flushing and sanitising the water tanks, checking for leaks or blockages in the plumbing lines, and inspecting and servicing the water pump. The cost of plumbing system maintenance can vary depending on the complexity of the system and any repairs or replacements needed. Budget between £50 to £200 for plumbing system maintenance, excluding additional parts or repairs.

3. Electrical system inspections: Campervans often have complex electrical systems powering various onboard devices, including lighting, entertainment systems and charging outlets. Regular inspections are essential to identify any potential issues and ensure safe operation. The cost of electrical system inspections can vary depending on the complexity of the system and any repairs or upgrades needed. Expect to pay between £50 to £150 for electrical system inspections, excluding additional repairs or upgrades.

4. Structural maintenance: Habitation maintenance also includes ensuring the structural integrity of the living quarters, including checking for leaks, inspecting seals and seams, and repairing any damage to the walls, roof, or flooring. The cost of structural maintenance can vary depending on the extent of the damage and the materials used for repairs. Budget between £100 to £500 or more for structural maintenance, depending on the scope of work required.

5. Gas system checks: If your campervan is equipped with a gas system for cooking or heating, regular checks and servicing of the gas appliances, regulators, and connections are essential to prevent leaks or malfunctions. The cost of gas system checks can vary depending on the complexity of the system and any repairs or replacements needed. Expect to pay between £50 to £150 for gas system checks, excluding any additional parts or repairs.


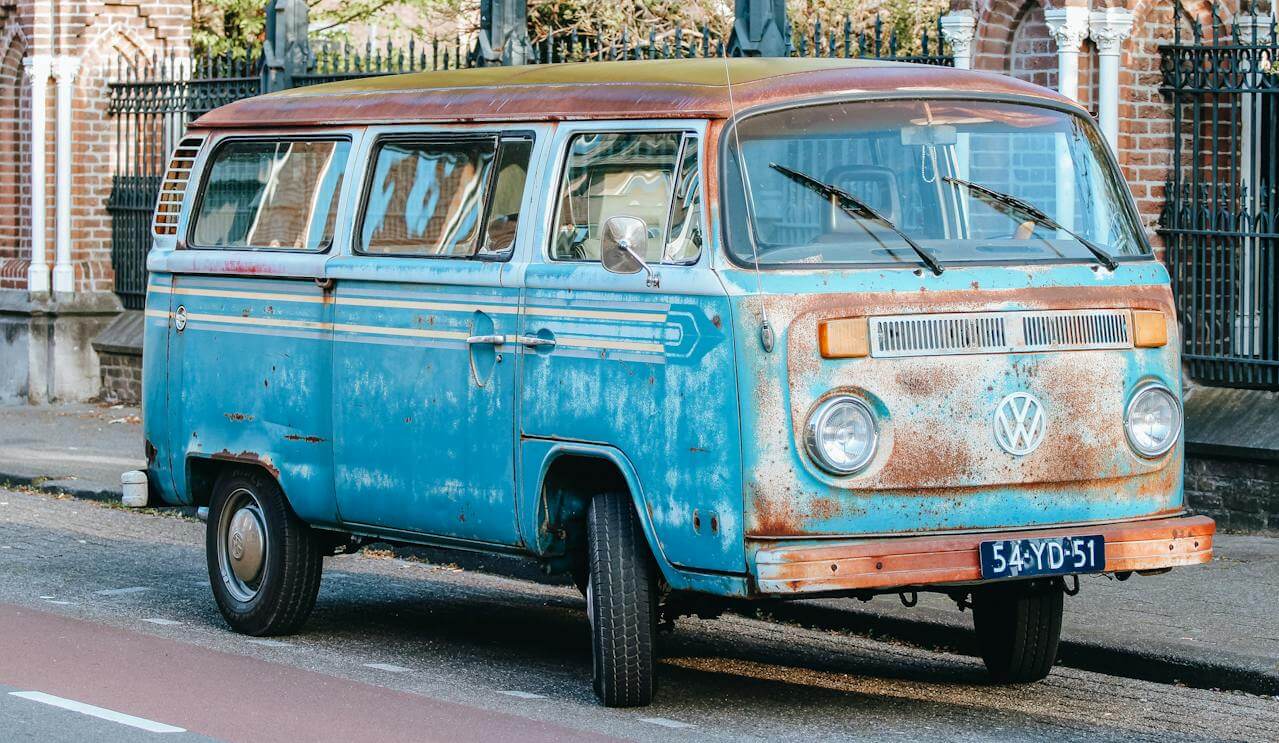
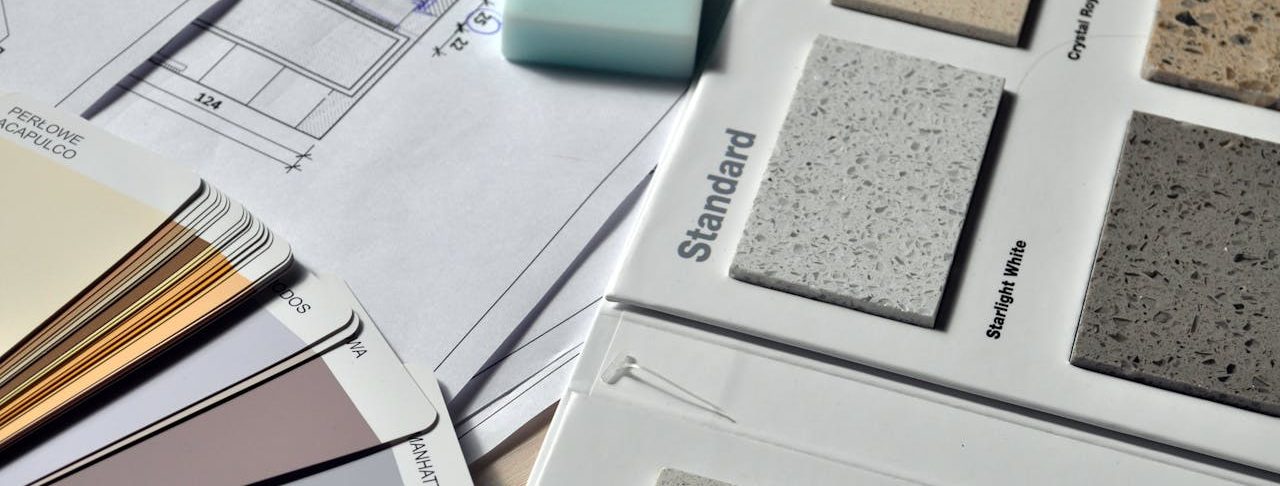
Bodywork and exterior maintenance

Over time, your campervan’s exterior may suffer wear and tear from exposure to the elements. Budget for occasional repairs such as rust treatment, dent removal, and painting to keep your van looking its best and protect it from further damage.

1. Rust treatment and repair: Rust is a common issue, especially in older campervans or those exposed to harsh weather conditions. Treating and repairing rust involves sanding or grinding away the rusted areas, applying a rust converter or inhibitor, and repainting the affected areas. The cost can vary depending on the extent of the rust damage and whether you do the work yourself or hire a professional. DIY rust treatment kits can start from around £20, while professional rust repair services can cost several hundred pounds or more, depending on the severity of the rust damage.

2. Dent removal: Dents and dings are inevitable, whether from parking lot mishaps or road debris. Removing dents typically involves paintless dent repair (PDR), which uses specialised tools to massage the metal back into shape without affecting the paint finish. The cost of dent removal can vary depending on the size and location of the dent and whether you hire a professional or attempt a DIY repair. Professional PDR services can range from £50 to £150 per dent, while DIY dent repair kits can start from around £15.

3. Paint touch-up and respray: Over time, campervan paint can fade, chip, or peel due to exposure to sunlight, weather, and road debris. Touching up paint chips or scratches and respraying faded or damaged areas can help maintain the appearance of your campervan. The cost of paint touch-up and respray depends on factors such as the area size, the type of paint used, and whether you hire a professional or do the work yourself. Professional paint touch-up services can start from around £100 for small areas, while a full respray can cost several hundred to several thousand pounds, depending on the size and complexity of the job.

4. Sealant and weatherproofing: Properly sealing and weatherproofing your campervan is essential to prevent water leaks, moisture damage, and corrosion. This may involve resealing windows, doors, roof vents, and other exterior fittings with specialised sealants and adhesives. The cost of sealant and weatherproofing materials depends on the type and quantity needed, with prices ranging from a few pounds for a tube of sealant to £50 or more for a complete sealant kit.

5. Panel replacement or repair: In some cases, extensive body damage may require replacing or repairing entire panels or sections of the campervan’s body. The cost of panel replacement or repair depends on factors such as the panel size and material, the complexity of the repair, and whether you hire a professional or do the work yourself. Professional panel replacement or repair services can range from a few hundred to several thousand pounds, depending on the extent of the damage and the type of panels involved.


Electrical system maintenance

Campervans often have complex electrical systems powering various onboard devices. Regularly inspect the wiring, fuses, and connections to prevent electrical failures. Factor in the cost of replacing worn-out components or upgrading your electrical system for increased efficiency and safety.

1. Battery maintenance: Campervans typically have one or more batteries to power onboard electrical systems, such as lights, appliances, and accessories. Maintenance tasks for batteries include regular inspections, cleaning terminals, checking fluid levels (for lead-acid batteries), and testing battery health. Battery maintenance cost is relatively low and mainly involves time and basic cleaning supplies.

2. Electrical system inspection: Regular inspections of the campervan’s electrical system are essential to identify potential issues, such as loose connections, corroded wires, or faulty components. DIY electrical system inspections require basic tools and knowledge of electrical systems while hiring a professional electrician can provide a more thorough inspection but at a higher cost. The cost of electrical system inspections can range from £50 to £150 or more, depending on the complexity of the system and the extent of the inspection.

3. Component testing and replacement: Campervan electrical systems consist of various components, such as fuses, switches, relays, wiring harnesses, and electronic devices. Testing these components regularly can help identify faulty or worn-out parts that need replacement. The cost of component testing and replacement varies depending on the specific components involved, with prices ranging from a few pounds for basic components like fuses to £50 or more for complex electronic devices.

4. Wiring repairs and upgrades: Over time, wiring in a campervan may suffer from wear and tear, corrosion, or damage from rodents or pests. Repairing or upgrading wiring involves identifying and fixing damaged wires, replacing connectors, and upgrading to higher-quality wiring for improved performance and safety. The cost of wiring repairs and upgrades depends on the extent of the work required and whether you do the work yourself or hire a professional electrician. DIY wiring repairs can cost as little as £20 for materials, while professional wiring repairs and upgrades can range from £100 to £500 or more, depending on the complexity of the job.

5. Solar panel maintenance: Campervans equipped with solar panels for off-grid power generation require regular maintenance to ensure optimal performance. This includes cleaning the solar panels to remove dirt, dust, and debris that can reduce efficiency, and checking connections and securing mounts. The cost of solar panel maintenance is relatively low and mainly involves time and basic cleaning supplies.
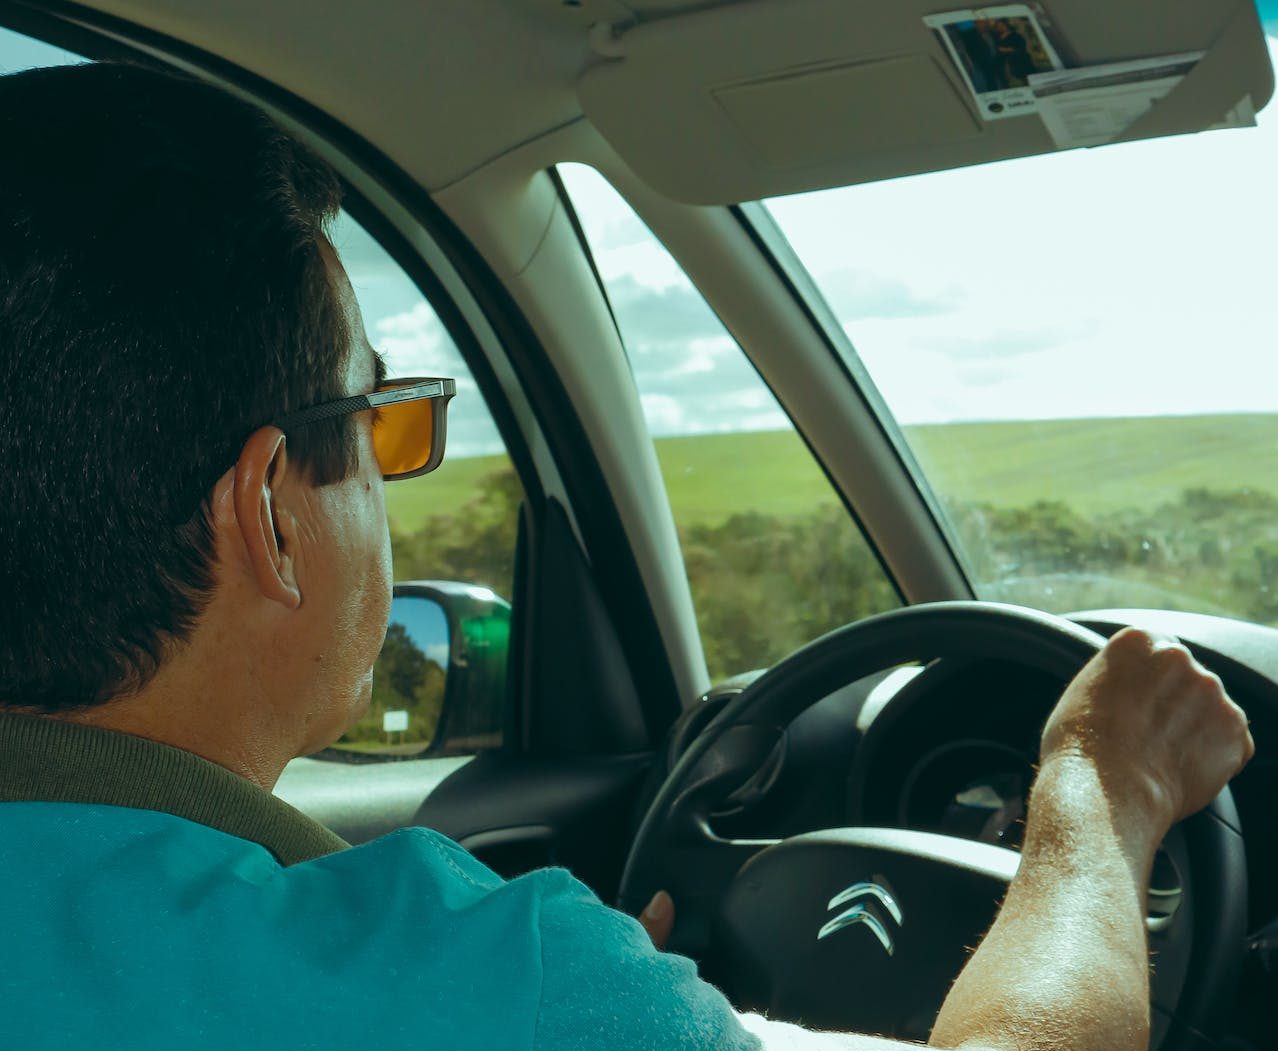
 

Fuel

Fuel expenses are a significant part of the running costs for any vehicle, including campervans. The amount you spend on fuel depends on factors such as the vehicle’s fuel efficiency, the distance travelled, and current fuel prices. Campervans typically have larger engines and may be less fuel-efficient than smaller vehicles; so fuel costs can be relatively high, especially during long-distance trips.


Insurance

Campervan insurance covers the vehicle and its contents, protecting against accidents, theft, damage, and liability. Insurance costs vary depending on factors like the vehicle’s value, age, usage, and the level of coverage selected. 

1. Third-party-only insurance: provides coverage for damage or injury caused to third parties but does not cover damage to your campervan. Prices for third-party-only insurance can start from around £100 to £300 per year, depending on factors such as the vehicle’s value and the driver’s age and driving history.

2. Third-party, fire, and theft insurance: in addition to covering damage or injury to third parties, this type of insurance also covers your campervan if it’s stolen or damaged by fire. Prices for third-party, fire, and theft insurance typically start from around £200 to £500 per year, depending on various factors.

3. Comprehensive insurance: This provides the highest level of coverage, including protection against third-party damage, fire, theft, and damage to your campervan. Prices for comprehensive insurance can range from £300 to £1,000 or more per year, depending on factors such as the vehicle’s value, age, and usage, as well as the driver’s age and driving history.


Road Tax (Vehicle Excise Duty)

In the UK, road tax, also known as Vehicle Excise Duty (VED), is a tax levied on vehicles to use public roads. Campervans are classified as goods vehicles (commercial vehicles) or motorhomes, and the road tax rates differ accordingly. The road tax for campervans in the UK ranges from £165 to £275 per year. 

This cost may vary based on the vehicle’s emissions rating and fuel type. Additionally, some campervans may qualify for reduced road tax rates if they meet certain criteria, such as being registered as disabled or having low emissions. 


Campsites and parking fees

While freedom camping is an option in some areas, you may need to pay for campsites or designated parking spots with amenities such as electricity, water, and waste disposal facilities. 

On average, expect to pay between £15 to £40 per night for campsites with basic facilities and between £20 to £60 or more for sites with amenities such as electricity, water hookups, and waste disposal. 

Parking fees for overnight stays in designated areas or parking lots can range from free to £20 or more per night, depending on the location and facilities.


Internet and communication

If you need internet access while on the road, budget for data plans or portable Wi-Fi devices. Consider purchasing SIM cards or data packages from local providers in the areas you’re travelling to save money on roaming charges. Plans range from £10-50 and are easy to pick up.


Tips for maintaining and running a campervan

Regular maintenance

  • Schedule routine maintenance for your campervan, including engine servicing, fluid checks, and brake inspections, as per the manufacturer’s recommendations.
  • Inspect the habitation area regularly for leaks, damage, and wear and tear. Address any issues promptly to prevent further damage.
  • Keep appliances, plumbing, and electrical systems in good working order by cleaning, testing, and servicing them regularly.
  • Check tyres for wear, damage, and proper inflation to ensure safe driving and optimal fuel efficiency.

Budget wisely

  • Create a monthly budget outlining your campervan expenses, including fuel, insurance, maintenance, and camping fees.
  • Monitor your spending and adjust your budget to stay within your financial means.
  • Set aside funds for unexpected expenses, such as repairs or emergencies, to avoid financial strain.

Fuel efficiency

  • Drive efficiently to maximise fuel economy, avoiding aggressive acceleration and braking, maintaining a steady speed, and minimising idling.
  • Plan your routes to minimize mileage and optimise fuel efficiency. Consider using GPS or route-planning apps to find the most efficient routes.
  • Keep your campervan’s weight as low as possible by packing only essential items and avoiding unnecessary cargo.

Campsite and parking selection

  • Research campsites and parking spots in advance to find affordable options with the amenities you need, such as electricity, water hookups, and waste disposal facilities.
  • Consider alternative camping options, such as wild camping or free overnight parking areas, to save money on camping fees.

Conservation and sustainability

  • Practice responsible camping by minimising your environmental impact, such as reducing water usage, conserving energy, and properly disposing of waste.
  • Use eco-friendly products and practices, such as reusable containers, biodegradable cleaning products, and solar-powered gadgets.

Emergency preparedness

  • Equip your campervan with emergency supplies, including first aid kits, tools, spare parts, and emergency contact information.
  • Stay informed about local weather conditions, road closures, and emergency services in the areas you’re travelling to.
  • Have a contingency plan for unexpected situations, such as vehicle breakdowns or medical emergencies, and know how to seek assistance.

Community and support

  • Join online forums, social media groups, or local campervan clubs to connect with other owners, share tips and advice, and access resources and support.
  • Attend campervan meetups, rallies, or events to learn from experienced owners, discover new destinations, and build a supportive community.

By following these tips, you can effectively maintain and run your campervan while enjoying the freedom and adventure of life on the road. Remember to prioritise safety, sustainability, and responsible camping practices to make the most of your campervan journey.


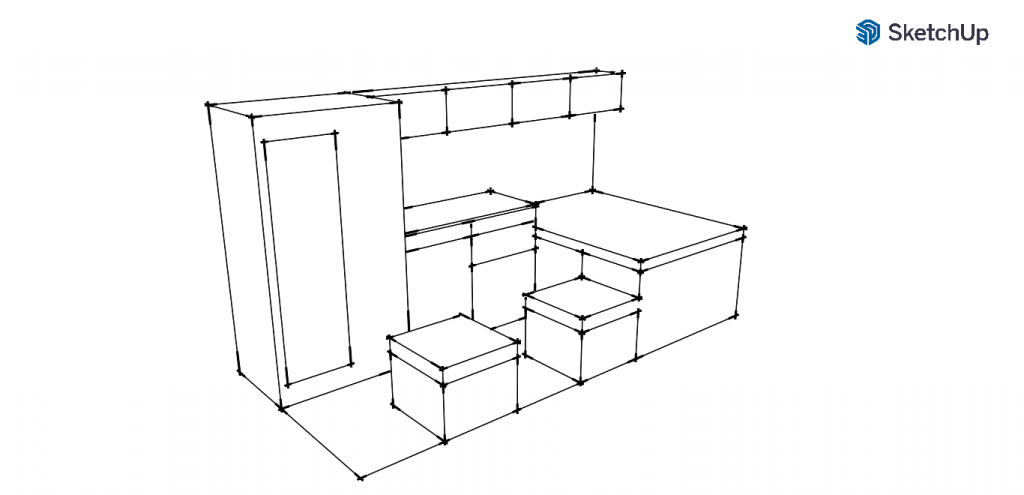
Embark on your van conversion journey with confidence

Living in a campervan offers unparalleled freedom, adventure, and a deeper connection with nature, but it also comes with its fair share of expenses and responsibilities. 

By understanding and budgeting for campervan maintenance costs and the costs of living in a van, you can embark on your van life journey with confidence and financial stability. 

Remember, van life is not just about saving money—it’s about embracing a simpler, more intentional way of living and creating meaningful experiences on the road. Safe travels, fellow van dwellers!

How to finance a campervan conversion

Embarking on a campervan adventure is a dream for many outdoor enthusiasts and wanderlusters alike. 

The freedom to roam wherever the road takes you, waking up to breathtaking views, and embracing a minimalist lifestyle on the go—it’s no wonder that campervan living has become increasingly popular. 

However, financing such a venture can seem daunting. Fear not! In this comprehensive guide, we’ll explore various avenues for financing your dream campervan.


Can I finance a campervan conversion?

Bhode Two - exterior van conversion

Yes, you can finance a campervan conversion. Some lenders offer specialised loans specifically for recreational vehicles, including campervans. These loans are typically similar to car loans or motorhome loans and can help you spread out the cost of purchasing a campervan over time.

When financing a campervan, you’ll need to go through a similar application process like any other type of loan. Lenders will assess factors such as your credit score, income, employment history, debt-to-income ratio, and the value of the campervan to determine your eligibility for financing and the loan terms.

It’s important to shop around and compare loan offers from different lenders to find the best terms and interest rates for your situation. Additionally, consider factors such as the down payment required, the length of the loan term, and any fees associated with the loan.

Financing a campervan is a significant financial commitment, so it’s essential to ensure you can comfortably afford the monthly payments and other expenses such as insurance, maintenance, and campground fees. 

With careful planning and research, financing can be a convenient way to make your dream of owning a campervan a reality.


How to finance a campervan: step-by-step

1. Assess your budget

Before you start shopping for a campervan, it’s essential to have a clear understanding of your budget. Consider how much you can afford to spend on the purchase, and ongoing expenses such as insurance, maintenance, fuel, and campground fees. Be realistic about what you can comfortably afford, factoring in both one-time expenses and monthly payments.

2. Price up the van and the conversion

The van and the conversion are usually two separate costs, although some van converters offer to source a vehicle and convert the van into one package. It’s important to get a solid figure of how much your van costs and your conversion costs to ensure you apply for the right amount of finance.

How much does a campervan conversion cost?

3. Check your credit score

Your credit score plays a significant role in determining your eligibility for financing and the interest rate you’ll qualify for. Before applying for a loan, check your credit score and take steps to improve it if necessary. A higher credit score can help you secure better loan terms and lower interest rates.

4. Explore financing options

Once you have a budget and an idea of the type of campervan you want, it’s time to explore financing options, such as cash, personal loans and vehicle finance.

5. Apply for finance

Once you’ve chosen a financing option, you can apply for a loan online, over the phone, or in person, depending on the lender’s preferences. You’ll need to provide personal and financial information, including your income, employment history, and any assets or debts.

6. Negotiate terms

After you’ve been approved for a loan, you may have the opportunity to negotiate the loan terms, including the interest rate, loan term, and down payment amount. Read the loan agreement carefully and ask questions about any terms you don’t understand.

7. Finalise the Purchase

Once you’ve agreed to the loan terms, you can finalise your agreement. This typically involves signing the loan documents and any other paperwork required by the lender. Once the paperwork is complete, you can begin your conversion and start enjoying your adventures on the road!

By following these steps and exploring your financing options, you can find the best way to finance your dream campervan and make it a reality.


What are my options when financing a van?

Here are some finance options for converting a van. Each finance option has different implications, and it’s important to ask your converter if they accept whatever finance option you choose.

1. Cash: cash is the best way to finance a van conversion project as you won’t pay any interest. However, a high-level conversion will cost anywhere between £20,000-40,000, and most people don’t have that type of money to hand.

2. Bank or credit union loans: traditional lenders such as banks and credit unions offer loans specifically for vehicle purchases, including vans. These loans often come with competitive interest rates and terms, especially for borrowers with good credit scores. You can apply for a loan directly from your bank or credit union, and if approved, you’ll make monthly payments until the loan is paid off.

3. Dealer financing: Many van dealerships offer financing options to customers through partnerships with lending institutions. Dealer financing can be convenient, as you can complete the purchase and financing process in one place. However, compare the terms and interest rates with other lenders to get the best deal. It’s also important to check that you can modify the vehicle, as some dealers won’t allow this.

4. Manufacturer financing: Some van manufacturers provide financing options directly to customers. These financing programs may offer special incentives or promotions, such as low-interest rates or cashback offers, to encourage purchases of their vehicles. Manufacturer financing can be a convenient option, but compare rates and terms with other lenders to ensure you’re getting the best deal. Manufacturer financing is more for people who want a ready-made campervan.

5. Online lenders: Many online lenders specialise in vehicle financing, including vans. These lenders often provide a streamlined application process and may offer competitive rates, especially for borrowers with good credit. Online lenders may also be more flexible in terms of eligibility requirements and loan terms.

6. Personal loans: If you can’t secure financing through traditional channels, consider taking out a personal loan to purchase a van. Personal loans typically have higher interest rates than vehicle loans, but they may be more accessible for borrowers with less-than-perfect credit or unconventional income sources.

7. Equity release

Another option if you own your home is to use equity release, in simple terms an advance loan payment on part of the value of your property. The most popular form of equity release is the lifetime mortgage, where the “loan” is paid back (with interest) only when the property is sold or the policyholder dies.

Before deciding on a financing option, assess your budget, compare rates and terms from multiple lenders, and consider your credit score, income, and how long you plan to keep the van. 

You also need to disclose the full project, you don’t want to mislead a lender into thinking they’re funding one thing, only to do something completely different.

You can find the best solution to suit your needs and budget by researching and exploring different financing options.


What factors influence a finance application?

Several factors can influence the outcome of a car finance application. Lenders assess these factors to determine the borrower’s creditworthiness and ability to repay the loan. Here are some key aspects that can impact a car finance application:

Credit Score

Perhaps the most significant factor is the applicant’s credit score. Lenders use credit scores to evaluate the borrower’s credit history and gauge the risk associated with lending to them. A higher credit score indicates responsible financial behaviour and may increase the chances of approval for favourable loan terms. Conversely, a lower credit score may result in higher interest rates or even rejection of the application.

Income and employment

Lenders typically require proof of stable income and employment to ensure that the borrower has the means to repay the loan. A steady income stream demonstrates financial stability and reduces the risk of default. Applicants with higher incomes and longer employment histories may receive more favourable loan offers.

Debt-to-income ratio

Lenders assess the borrower’s debt-to-income ratio, which compares their monthly debt payments to their gross monthly income. A lower debt-to-income ratio indicates that the borrower has more disposable income to cover loan payments, making them a lower risk for lenders.

Deposit

The size of the down payment can significantly impact a car finance application. A larger down payment reduces the loan amount and shows the lender that the borrower is committed to the purchase. It also lowers the loan-to-value ratio, which can result in better loan terms.

Loan term

The length of the loan term can affect the likelihood of approval and the interest rate offered. Shorter loan terms typically come with lower interest rates but higher monthly payments, while longer loan terms may have lower monthly payments but higher overall interest costs.

Vehicle value

The value of the vehicle is another consideration for lenders. Newer or more valuable vans may be easier to finance because they serve as collateral for the loan. Conversely, older or less valuable vehicles may be more difficult to finance or may come with higher interest rates.

Loan type

The type of loan applied for can also impact the approval process. For example, secured loans, where the vehicle serves as collateral, may be easier to qualify for than unsecured loans. Additionally, specialised loans such as those for bad credit or first-time buyers may have different approval criteria.

Credit history

In addition to the credit score, lenders may review the applicant’s credit history for any past delinquencies, bankruptcies, or other negative marks. A clean credit history demonstrates responsible financial behaviour and increases the likelihood of approval.


Speak to us about your campervan conversion

If you want to convert a van into a camper and you’re unsure about how to do it, get in touch with us and we can go through your options and make your dream a reality!

Campervan flooring guide: How to choose the right flooring for your conversion

Choosing the right floor for your campervan conversion means considering several factors to ensure it meets your needs and preferences. 

In this blog, we’ll look at the different types of flooring available to campervan converters, whether you need to install a floor in your campervan, subfloors and top floors, and where to buy your flooring.

How to choose the right flooring for your campervan

Before you buy any flooring there are certain factors you need to consider. Get the pen and notepad out and jot down your ideas as you go through our guide.

Define your requirements

Consider how you plan to use your campervan. Are you looking for durability, insulation, ease of maintenance, or aesthetics? Think about your priorities to narrow down your options.

Consider weight

Campervans have weight limits, so choose lightweight flooring to avoid exceeding these limits. Look for materials like vinyl or lightweight laminate that offer durability without adding too much weight.

DVLA requirements for van conversions: How to make your van road legal

Check insulation needs

If you’re converting your campervan for all-season use, consider the insulation properties of the flooring. Some materials, like rubber or cork, provide better insulation than others, helping to keep your van warm in colder months.

Assess water resistance

Campervans are prone to moisture buildup, especially in wet climates or during outdoor activities. Choose flooring materials that are waterproof or water-resistant to prevent damage and mould growth. Vinyl, rubber, and certain laminates are good options for water resistance.

Think about maintenance

Consider how much maintenance different flooring options require. Some materials, like vinyl and laminate, are easy to clean and maintain, while others, like carpet, may require more effort.

Factor in aesthetics

Your campervan’s flooring contributes to its look and feel. Choose a flooring material and design that complements your interior style and personal preferences. Consider factors like colour, pattern, and texture.

Budget considerations

Determine your budget for flooring and prioritise features based on your budget constraints. While some materials may be more expensive upfront, they could save you money in the long run due to their durability and low maintenance requirements.

Test samples

Obtain samples of different flooring materials to see how they look and feel in your campervan. This will give you a better idea of how each material will perform in your space.

Research installation requirements

Consider the installation process for each flooring option and whether you’re comfortable tackling it yourself or prefer to hire a professional. Some materials may require special tools or techniques for installation.

Read reviews and seek recommendations

Research reviews and seek recommendations from other campervan owners or conversion specialists to learn about their experiences with different flooring materials. This can help you make an informed decision based on real-world feedback.

By following these steps and considering your specific needs and preferences, you can choose the flooring for your campervan conversion that enhances functionality and aesthetics.


What’s the difference between a subfloor and a top floor?

In the context of a campervan conversion or any construction project, the terms ‘subfloor’ and ‘top floor’ refer to different layers of flooring materials, each serving distinct purposes. Here’s a breakdown of the differences between a subfloor and a top floor:

Subfloor

Location 

The subfloor is the bottom layer of the flooring, typically installed directly on the structural frame or base of the vehicle (e.g. metal chassis in the case of a campervan).

Purpose

The primary function of the subfloor is to provide a level and stable surface for installing the top floor. It acts as a foundation that supports the weight of the top floor and provides structural integrity to the flooring system.

Materials

Subfloor materials are chosen for their strength, durability, and suitability for the application. Common subfloor materials include plywood, oriented strand board (OSB), or metal sheeting, depending on the construction requirements and preferences. Some vans may already have suitable subfloor, so check when you buy your van.

Insulation and moisture barrier

In addition to providing a base for the top floor, the subfloor may also incorporate insulation materials and moisture barriers to enhance thermal efficiency and prevent moisture-related issues such as condensation or water damage.


Top floor

Location

The top floor is the visible layer of flooring installed on top of the subfloor, serving as the walking surface inside the campervan.

Purpose

The top floor serves both functional and aesthetic purposes. It provides a comfortable and durable surface for occupants to walk on while contributing to the ambience.

Materials

Top floor materials vary depending on personal preference, budget, and desired characteristics. Common options include vinyl flooring, laminate flooring, carpet tiles, rubber flooring, hardwood flooring, linoleum, and cork flooring.

Design and appearance

The top floor is visible and influences the look and feel of the interior space. Therefore, it is often chosen based on factors such as colour, texture, pattern, and style to achieve the desired aesthetic.

In summary, the subfloor provides structural support and a foundation for the top floor. The top floor is the visible layer of flooring that contributes to the functionality and appearance of the interior space in a campervan or any construction project.

Campervan floor layout guide: importance, layout types and how to design a floor plan


Do I need to install a subfloor in my campervan?

Whether you need to install a subfloor in your campervan depends on various factors, including your specific needs, preferences, and the existing condition of the vehicle. Here are some considerations to help you decide:

Base condition

If your campervan has a solid and level base, such as a metal chassis or a sturdy existing floor, you may not need to install a separate subfloor. In such cases, you can install the top flooring material on the existing surface after ensuring it’s prepared and suitable for the chosen flooring option.

Structural support

A subfloor provides structural support and stability for the top flooring material. If the existing base of your campervan lacks sufficient structural integrity or is uneven, installing a subfloor can help create a stable foundation for the top floor and ensure a level surface.

Insulation

A subfloor can also serve as a layer of insulation, helping to regulate temperature and reduce heat loss or gain within the campervan. If you prioritise thermal efficiency and comfort, especially in varying weather conditions, installing a subfloor with insulation materials may be beneficial.

Moisture protection

In some cases, a subfloor can act as a barrier against moisture, preventing water from seeping into the interior of the campervan and causing damage to the flooring materials. This is particularly important if your campervan is prone to moisture issues or if you plan to travel in wet climates.

Flooring material compatibility

Consider the compatibility of your chosen flooring material with the existing base of your campervan. Some flooring options may require a specific type of subfloor or preparation to ensure proper installation and long-term performance.

Ultimately, deciding to install a subfloor in your campervan depends on your specific requirements and the vehicle’s condition.

It’s essential to assess the structural integrity, insulation needs, and compatibility with your chosen flooring material before installing. 

If you’re unsure or need guidance, consulting with a professional camper van conversion specialist can help you decide based on your unique circumstances.


What are the different flooring options for campervans?

Vinyl flooring

Vinyl flooring is popular for campervans due to its durability, water resistance, and easy maintenance. It’s available in various styles and designs, including wood and tile patterns. Vinyl is lightweight and affordable, making it suitable for camper van conversions.

Pros:

  • Waterproof: Resistant to water and moisture, making it suitable for campervans where spills or humidity might occur.
  • Easy to clean: Wipe-clean surface makes maintenance simple.
  • Durable: Can withstand heavy foot traffic and is scratch and stain resistant.
  • Lightweight: Doesn’t add much weight to your campervan.

Cons:

  • Limited insulation: provides minimal insulation compared to other options.
  • Limited aesthetic options: While available in various designs but may not offer as much customisation as other materials.

Laminate flooring

Laminate flooring is another popular option known for its durability and aesthetic appeal. It consists of a synthetic layered construction that mimics the look of wood or tile. Laminate flooring is easy to clean and install, making it suitable for DIY campervan projects.

Pros:

  • Durable: Resistant to scratches, stains, and wear, making it suitable for high-traffic areas.
  • Easy to clean: Requires minimal maintenance and can be cleaned with a damp cloth.
  • Aesthetic variety: Available in a range of colours, patterns, and finishes to suit different interior styles.

Cons:

  • Water sensitivity: Susceptible to water damage if exposed to moisture for extended periods, so proper sealing is essential.
  • Weight: Slightly heavier than vinyl, which may be a concern for weight-conscious conversions.

Carpet tiles

Carpet tiles offer a soft and comfortable flooring option for campervans. They come in various colours and patterns, allowing for interior space customisation. Carpet tiles are easy to install and replace, making them a practical choice for camper van conversions.

Pros:

  • Soft and comfortable: Provides a cosy feel underfoot, making it ideal for cold climates.
  • Insulating: Offers better insulation properties compared to hard flooring options, helping to retain heat.
  • Easy to replace: Individual tiles can be replaced if damaged, offering convenience and cost-effectiveness.

Cons:

  • Prone to staining: Spills and stains may be more challenging to clean compared to hard flooring surfaces.
  • Retains moisture: Can absorb moisture odours if not properly maintained, which can lead to mould or mildew growth.

Rubber flooring

Rubber flooring is a durable and resilient option for campervans, providing excellent traction and impact resistance. It’s waterproof and easy to clean, making it suitable for outdoor and adventure-oriented conversions. Rubber flooring is available in rolls or tiles and comes in various colours and textures.

Pros:

  • Waterproof: Resistant to water and moisture, making it suitable for wet environments.
  • Durable: Withstands heavy use and is scratch, stain and abrasion resistant.
  • Insulating: Provides some thermal insulation and sound-dampening properties.

Cons:

  • Limited aesthetic options: Typically available in a limited range of colours and patterns.
  • Initial odour: May emit a rubber odour initially, which dissipates over time.

Cork flooring

Cork flooring is an eco-friendly option made from the bark of cork oak trees. It’s naturally resistant to mould, mildew, and pests, making it ideal for campervans. Cork flooring provides excellent insulation and cushioning, creating a comfortable and quiet interior environment.

Pros:

  • Sustainable: Made from renewable cork material, making it an eco-friendly choice.
  • Insulating: Provides natural thermal and sound insulation properties.
  • Comfortable: Offers a soft and comfortable surface to walk on.

Cons:

  • Susceptible to damage: Can be damaged by sharp objects or heavy furniture if not properly protected.
  • Requires sealing: Needs to be sealed to prevent water damage, especially in moisture-prone areas like bathrooms or kitchens.

Hardwood flooring

Hardwood flooring adds a touch of elegance and warmth to campervan interiors. While it’s less common due to its weight and cost, hardwood flooring offers durability and timeless appeal. Engineered hardwood or bamboo flooring may be more suitable for camper van conversions due to their lighter weight and better moisture resistance.

Pros:

  • Durability: Hardwood flooring is known for its durability and can withstand heavy foot traffic and wear over time, making it suitable for campervans.
  • Aesthetic appeal: Hardwood flooring adds a touch of elegance and warmth to the interior of the campervan, enhancing its look and feel.
  • Longevity: With proper maintenance, hardwood flooring can last decades, providing long-term value for your campervan conversion.
  • Easy maintenance: Hardwood flooring is easy to clean and maintain, requiring regular sweeping and occasional mopping with a wood-friendly cleaner.
  • Resale value: Installing hardwood flooring in your campervan may increase its resale value, as it’s a desirable feature for many buyers.

Cons:

  • Weight: Hardwood flooring is heavier than many other flooring options, which may be a concern for campervans with weight restrictions or those aiming to maximise fuel efficiency.
  • Cost: Hardwood flooring can be more expensive upfront compared to other flooring materials, potentially increasing the cost of your campervan conversion project.
  • Vulnerability to moisture: Hardwood flooring is susceptible to damage from moisture, making it less suitable for environments prone to spills or high humidity levels. Proper sealing and maintenance are necessary to prevent water damage.
  • Maintenance requirements: While easy to maintain, hardwood flooring may require periodic refinishing or resealing to keep it looking its best, which can be time-consuming and costly.
  • Environmental considerations: Depending on the source and manufacturing process, hardwood flooring may raise environmental concerns related to deforestation and chemical use. Opting for sustainably sourced hardwood or alternative eco-friendly materials may mitigate these issues.

Linoleum flooring

Linoleum flooring is a natural and eco-friendly option made from linseed oil, wood flour, cork dust, and other renewable materials. It’s durable, water-resistant, and easy to clean, making it suitable for campervans. Linoleum comes in various colours and patterns, allowing for creative customisation of the interior space.

Pros:

  • Durability: Resistant to heavy foot traffic and wear, making it suitable for campervan interiors.
  • Water resistance: Naturally resistant to water and moisture, ideal for environments prone to spills or humidity.
  • Easy maintenance: Simple to clean and maintain with regular sweeping and mopping.
  • Eco-friendly: Made from natural and renewable materials, offering an environmentally-friendly flooring option.
  • Comfortable underfoot: Provides a slightly cushioned feel, enhancing comfort for occupants.
  • Variety of designs: Available in various colours, patterns, and styles for customisation.

Cons:

  • Susceptible to scratches and dents: Can be scratched or dented by sharp objects or heavy furniture.
  • Installation complexity: Requires careful preparation of the subfloor and adhesive application for proper installation.
  • Higher initial cost: May have a higher upfront cost compared to some other flooring options.
  • Limited insulation: Provides some insulation but may not offer as much thermal or sound insulation as thicker materials.
  • Vulnerability to moisture damage: While resistant to water, it can still be damaged by prolonged exposure to moisture if not properly sealed or maintained.

Each flooring option has pros and cons, so it’s important to choose the one that best suits your needs, preferences, and budget for your campervan conversion project.


Can I install heated flooring in my campervan?

Yes, you can install heated flooring in your campervan, although there are some considerations to keep in mind:

Power source

Heated flooring systems typically require electricity to operate. Ensure that your campervan’s electrical system can handle the additional load of the heated flooring without overloading the circuit or draining the battery excessively. You may need to upgrade your electrical system or install a separate circuit for the heated flooring.

Insulation

Proper insulation is essential when installing heated flooring in a campervan. Without adequate insulation, heat may escape through the floor, reducing the efficiency of the system and wasting energy. Consider adding insulation layers beneath the heated flooring to improve thermal efficiency and retain heat inside the van.

Flooring material compatibility

Not all flooring materials are suitable for use with heated flooring systems. Before installing heated flooring, ensure that the flooring material you choose is compatible with radiant heat and won’t be damaged by the elevated temperatures generated by the system. Ask the flooring material manufacturer if it’s compatible with heated flooring.

Installation considerations

Installing heated flooring in a campervan may require careful planning and professional installation, especially if it involves embedding heating elements within the floor or connecting the system to the electrical supply. Ensure the installation process is carried out correctly to prevent any safety hazards or damage to the van.

Control options

Consider how you will control the heated flooring system in your campervan. Some systems come with thermostats or temperature controls that allow you to adjust the heat output as needed. Choose a control option that suits your preferences and provides convenient access to regulate the temperature inside the van.

While it is possible to install heated flooring in a campervan, it’s essential to consider factors such as power source, insulation, flooring material compatibility, installation requirements, and control options to ensure a safe and efficient heating solution for your van. 

Consulting with a professional installer or heating specialist can help you determine the best approach for your specific needs and preferences


When should I install the flooring in my campervan?

The timing for installing the floor in your campervan depends on various factors, including the progression of your conversion project and personal preferences.

There’s no ‘set time’ as such, but there are some jobs that you should complete before the flooring goes in. Here are some considerations to help you decide when to install the floor:

Construction sequence

The floor installation typically occurs after completing certain foundational aspects of the campervan conversion, such as insulation, electrical wiring, and any necessary structural modifications. Installing the floor at the appropriate stage ensures it remains intact and undamaged during subsequent construction tasks.

Accessibility

Consider the ease of access to the interior space of your campervan during the construction process. Installing the floor earlier in the conversion allows for better accessibility to the floor area and facilitates other tasks, such as installing cabinetry, furnishings, and fixtures.

Flooring material compatibility

Certain flooring materials may have specific installation requirements or recommendations regarding timing. Follow the manufacturer’s instructions and guidelines for the optimal timing of floor installation based on the selected flooring material.

Protection from damage

Installing the floor earlier in the conversion process can help protect it from potential damage caused by construction activities, such as spills, debris, or accidental impacts. However, consider covering or protecting the installed floor during subsequent construction tasks to prevent damage.

Integration with other components

Coordinate the timing of floor installation with other components of the campervan, such as cabinetry, appliances, and furnishings. Ensuring proper alignment and integration of these elements may influence the timing of floor installation.

Climate and weather conditions

If working in an outdoor environment or areas with fluctuating weather conditions consider the impact of temperature, humidity, and precipitation on the floor installation process. Choose appropriate weather conditions for installing the floor to ensure optimal adhesion, sealing, and drying of materials.

Personal timeline

Consider your timeline and schedule for completing the campervan conversion. Plan the floor installation based on your availability, resources, and desired completion date for the project.

In summary, the floor installation in your campervan should be timed appropriately within the conversion process, considering factors such as construction sequence, accessibility, flooring material compatibility, protection from damage, integration with other components, climate conditions, and personal timeline. 

By carefully planning and coordinating the timing of floor installation, you can ensure a successful and efficient conversion of your campervan.


Where to buy campervan flooring in the UK

In the UK, you can buy campervan flooring from various retailers, both online and offline. Here are some options:

Speciality campervan conversion retailers

Several retailers specialize in campervan conversion supplies and accessories in the UK. These stores often carry a range of flooring options suitable for campervans. Examples include Kiravans, Camperco, and VanPimps.

DIY stores

Visit popular DIY stores such as B&Q, Wickes, or Homebase. They typically stock a variety of flooring materials suitable for campervan conversions, including vinyl, laminate, and carpet tiles.

Online retailers

Explore online marketplaces like Amazon UK, eBay UK, or specialist campervan conversion websites. These platforms offer a wide selection of flooring materials, often with customer reviews and competitive pricing.

RV dealers and suppliers

RV dealerships and suppliers in the UK may carry flooring options suitable for campervans. Visit or contact local dealerships to inquire about available products or recommendations for campervan flooring.

Flooring manufacturers

Contacting flooring manufacturers or visiting their websites can provide access to a comprehensive range of flooring options. Some manufacturers may offer online purchasing or provide information on local distributors in the UK.

Local flooring stores

Visit local flooring stores in your area to explore their selection of flooring materials. While primarily catering to residential or commercial applications, some stores may carry suitable options for campervan conversions.

Secondhand or salvage yards

Consider checking secondhand or salvage yards for discounted or reclaimed flooring materials. You may find unique options at a lower cost, though availability and conditions may vary.

Before purchasing campervan flooring, ensure that you have accurate measurements of your van’s interior space and consider factors such as material durability, ease of installation, maintenance requirements, and compatibility with your conversion design. Additionally, compare prices, warranties, and customer reviews to make an informed decision.


Should I install campervan flooring myself or hire a professional?

Whether to install campervan flooring yourself or hire a professional depends on several factors, including your DIY skills, experience, time availability, budget, and the complexity of the installation. Here are some considerations to help you decide:

Installing campervan flooring yourself

  • DIY skills: If you have experience with DIY projects and feel confident in your skills, installing campervan flooring yourself can be a rewarding and cost-effective option.
  • Budget: DIY installation can help you save money on labour costs, as you won’t have to pay for professional installation services. However, consider the cost of materials, tools, and any potential mistakes or rework.
  • Flexibility: Installing flooring yourself gives you greater flexibility and control over the project timeline and design choices. You can work at your own pace and make adjustments as needed without relying on a contractor’s schedule.
  • Learning experience: DIY installation allows you to learn new skills and gain a deeper understanding of your campervan’s construction and systems. It can be a fulfilling and educational experience if you enjoy hands-on projects.

Hiring a professional

  • Complexity: If the campervan flooring installation requires specialised tools, techniques, or expertise, hiring a professional may ensure a high-quality result. Complex installations, such as heating systems or intricate patterns, may benefit from professional knowledge and experience.
  • Time constraints: If you have limited time available or prefer to expedite the project, hiring a professional can save you time and effort. Professionals have the experience and resources to complete the installation efficiently and effectively.
  • Quality assurance: Professional installers have the skills and training to achieve precise measurements, proper alignment, and seamless finishes. They can ensure that the flooring is installed correctly and meets industry standards for safety and durability.
  • Warranty and guarantee: Many professional installers offer warranties or guarantees on their workmanship, providing peace of mind in case of any issues or defects. This additional protection may be worth the investment, especially for more complex or expensive flooring materials.

Ultimately, deciding to install campervan flooring yourself or hire a professional depends on your circumstances, preferences, and priorities. 

Consider your skills, budget, timeline, and the complexity of the installation, and choose the option that best aligns with your needs and goals for your campervan conversion project.

If you’re unsure, you can always consult a professional for advice or assistance with specific aspects of the installation.


Talk to us about your campervan conversion

If you need more information on how to convert your dream campervan, visit our enquiries page and we’ll provide all the knowledge and support you need to begin.

Campervan floor layout guide: importance, layout types & how to design a floor plan

In recent years, the allure of the open road and the freedom to explore uncharted territories have driven a surge in the popularity of campervan living. 

Whether you’re a seasoned traveller or a weekend adventurer, the layout of your campervan plays a crucial role in creating a comfortable and functional home on wheels. 

In this blog, we’ll dive into the exciting world of campervan layouts, exploring the diverse designs that cater to different lifestyles and preferences.


Why is layout important?

The campervan layout is a critical factor in determining the functionality, comfort, and convenience of your mobile living space. Here are several reasons highlighting the importance of campervan layout:

Space optimisation

Campervans have limited space, and a well-thought-out layout is essential for optimising every square inch. Efficient use of space ensures that you have room for sleeping, cooking, dining, and storage without feeling cramped.

Functionality

The layout directly impacts how functional your campervan is for various activities. A thoughtfully designed kitchen, comfortable sleeping area, and practical storage solutions contribute to the functionality of the space.

Comfort and livability

Comfort is crucial, especially if you plan to spend extended periods on the road. The layout influences factors like seating arrangements, bed placement, and the flow of the interior. A comfortable and well-designed layout enhances the livability of your campervan, making it a true home on wheels.

Adaptability to lifestyle

Different campervan layouts cater to various lifestyles. Whether you’re a solo traveller, a couple, or a family, the layout should accommodate your specific needs and preferences. Some layouts are more social, while others prioritise privacy or outdoor living.

Travel style

Your preferred travel style influences the ideal campervan layout. For instance, if you enjoy cooking with a view, a rear galley layout might be suitable. If you prioritise socialising, a front lounge design may be more appealing. Consider your travel habits and design a layout that complements your preferred activities.

Storage solutions

Effective storage is crucial for keeping your belongings organised and easily accessible. A well-planned layout integrates ample storage spaces for clothing, gear, and kitchen supplies. This helps prevent clutter and enhances the functionality of the campervan.

Aesthetic appeal

While functionality is key, the aesthetic appeal of your campervan is also important. A visually pleasing and well-designed layout can contribute to a positive and enjoyable living experience. Personalising the interior with colours, materials, and decor that reflect your style enhances the ambience.

Resale value

A thoughtfully designed and functional campervan layout can positively impact its resale value. Potential buyers often look for layouts that suit their needs, making a well-designed interior an attractive feature in the resale market.

The campervan layout is a fundamental aspect of the nomadic lifestyle. It directly influences how you experience life on the road, affecting everything from daily activities to long-term comfort. Taking the time to carefully plan and choose the right layout ensures that your campervan becomes a personalised haven that aligns with your unique preferences and requirements.


Types of campervan floor layout

1. The classic: bed and kitchenette combo

One of the most popular and efficient campervan layouts features a bed in the back, combined with a small kitchenette along one side. This design optimises space, allowing for a cosy sleeping area while still providing essential kitchen facilities. The kitchenette typically includes a stove, sink, and storage, creating a compact yet functional living space.

2. Rear galley layouts: cooking with a view


For those who appreciate a scenic meal prep experience, the rear galley layout is an excellent choice. Placing the kitchen facilities at the rear of the van allows you to cook while enjoying panoramic views. This layout often incorporates a fold-out table, creating an outdoor cooking and dining area. It’s a perfect option for nature lovers who want to blend the boundaries between indoor and outdoor living.

3. Modular flexibility: adapting to your needs

Modular campervan layouts offer adaptability and flexibility, allowing you to customise your space based on your changing needs. With removable or reconfigurable components, such as modular furniture and foldable beds, you can transform your campervan to suit various activities, from cooking and dining to sleeping and storage. This layout is ideal for those who crave versatility and want to make the most of limited space.

4. Front lounge design: a social hub on wheels


For campervan enthusiasts who value socialising and entertaining, a front lounge layout is a great option. This design places a seating and dining area at the front of the van, fostering a social hub that can accommodate gatherings, meals, and relaxation. The bed is typically located at the rear, ensuring a separate sleeping space for privacy.

5. High roof conversions: vertical living

Campervans with high roofs provide an opportunity for vertical living, allowing for extra storage, raised beds, and standing room. This design creates a more spacious and airy interior, making the campervan feel less confined. High roof conversions are popular among those who prioritise comfort and want to enhance the livability of their mobile home.

Blog: Campervan conversion kitchen guide


How to design a campervan floor plan

Designing a campervan floor plan requires thoughtful consideration of your specific needs, preferences, and the type of travel you plan to undertake. Here’s a step-by-step guide to help you design a functional and personalised campervan floorplan:

1. Define your purpose and lifestyle

 Consider the primary purpose of your campervan. Are you a solo traveller, a couple, or a family? Do you plan to take short weekend trips or embark on extended road journeys? Understanding your lifestyle and travel habits will guide the design.

2. List essential features

Make a list of essential features you want in your campervan, such as a bed, kitchenette, bathroom (if desired), storage, seating, and any specific equipment or gear. Prioritise these features based on your needs.

3. Measure and assess space

Measure the interior dimensions of your campervan. Take note of windows, doors, wheel wells, and any other fixed structures. Consider the shape of the van and how it might affect the layout.

4. Identify non-negotiables

Identify non-negotiable elements in your design, such as fixed features or equipment. For example, if you have a specific bed size in mind or need a certain kitchen appliance, these become foundational elements in your layout.

5. Consider flow and functionality

Think about the flow of your daily activities. Place the kitchen close to the entrance for easy access, and consider the proximity of the bed to any windows for ventilation and views. Ensure that there’s a logical flow from one area to another.

6. Explore layout options

Research various campervan layouts to get inspiration. Look at different designs, such as the classic bed and kitchenette combo, rear galley layouts, modular designs, and front lounge layouts. Consider which layout best suits your needs and preferences.

7. Sketch your ideal layout

 Start sketching your ideal floor plan on paper or use digital design tools. Begin with basic shapes to represent key elements like the bed, kitchen, bathroom, and storage. Experiment with different arrangements until you find a layout that feels right.

8. Maximise storage

Campervans have limited space, so prioritise efficient storage solutions. Consider using under-bed storage, overhead cabinets, and modular furniture with built-in storage compartments. Think vertically to make the most of the available space.

9. Balance aesthetics and functionality

While functionality is paramount, don’t overlook the aesthetics. Choose materials, colours, and finishes that create a visually appealing and comfortable living space. Personalise the design to reflect your style.

10. Seek feedback and refine

Share your initial design with fellow campervan enthusiasts, friends, or online communities. Gather feedback on potential improvements and make necessary adjustments. Iterative refinement is key to achieving the best layout for your needs.

11. Consider future modifications

Anticipate potential modifications or upgrades in the future. Design the layout with flexibility in mind, allowing for changes as your needs evolve or new technologies become available.

12. Build in stages

If possible, consider building the interior of your campervan in stages. This allows you to test and refine each component before moving on to the next. It also provides flexibility for adjustments along the way.

Remember, designing a campervan floor plan is a personal and creative process. Take the time to envision your ideal living space and tailor the layout to meet your specific requirements. The goal is to create a campervan that not only meets your practical needs but also enhances your travel experience.


Each campervan has endless possibilities

Campervan layouts offer a myriad of possibilities, each catering to different preferences and lifestyles. Whether you prioritise compact efficiency, scenic cooking experiences, modular adaptability, social hubs, or vertical living, there’s a campervan layout that suits your needs. 

As you embark on the journey of designing your home on wheels, consider how these layouts can contribute to your campervan lifestyle’s comfort and functionality. 

After all, the open road awaits, and your campervan layout is the key to unlocking the freedom of the nomadic lifestyle.


Campervan conversion kitchen guide: Layouts, DIY vs pro & safety considerations

Whether you’re a van lifer, holidaymaker or off-grid camper, you need food to fuel you for your adventures. 

You need to make sure you choose the option that best suits you – some people love the accomplishment of creating a fresh, tasty meal on the road, whereas others prefer to spend their time doing other things.

In this campervan conversion kitchen guide, we look at whether a kitchen is necessary for your conversion, different kitchen layouts, kitchen safety and whether you should use a professional or install a kitchen yourself.


Do I need a kitchen in my campervan conversion?

It depends on your personal preferences, travel style, and the duration of your trips. Here are some factors to consider:

Trip duration

For short trips or weekend getaways, you might be able to use pre-packaged or easy-to-prepare meals that don’t need a dedicated kitchen setup. In such cases, a simple portable stove or no cooking facilities may suffice.

Do you enjoy cooking?

If you enjoy cooking and want the flexibility to prepare your meals, having a campervan kitchen becomes more important. It allows you to have control over your diet and can save you money compared to eating out. It’s also healthier than eating pre-packaged foods.

Convenience

Having a kitchen in your campervan provides convenience, especially in remote areas where access to restaurants or supermarkets is limited. You won’t have to rely on finding suitable food options while on the road. However, some people think it’s more convenient to pick up food on the go, so it’s up to you.

Cost considerations

Eating out can add up expenses during a road trip. A campervan kitchen can help you save money by allowing you to prepare your meals using more budget-friendly ingredients. However, there is a cost to set up your kitchen, so it’s worth considering whether you will use it.

Self-sufficiency

A campervan kitchen enhances your self-sufficiency, allowing you to be more independent during your travels. A kitchen is valuable if you enjoy off-the-grid camping or exploring less populated areas. If you tend to stick to semi-rural or urban areas self-sufficiency isn’t as crucial.

Space constraints

Consider the size of your campervan and how much space you’re willing to spend on a kitchen. You might opt for a more compact kitchen setup or rely on alternative cooking methods like portable stoves or grills if space is limited.

Health and dietary restrictions

If you have specific dietary requirements or restrictions, having a campervan kitchen allows you to have better control over your meals, ensuring they align with your health goals or dietary needs.

Comfort and enjoyment

For many, the ability to cook and enjoy a home-cooked meal in the comfort of their campervan adds to the enjoyment of the travel experience. It can create a cosy and personalised space.

Ultimately, deciding to include a kitchen in your campervan depends on your preferences, lifestyle, and how you envision your travel experience. Some campervan owners may choose a minimalistic approach, while others prioritise the convenience and comfort of a fully-equipped kitchen.


What layout should I pick for my campervan kitchen?

Designing an efficient and practical campervan kitchen layout involves maximising the available space while ensuring functionality and ease of use. Here are some considerations and ideas for a campervan kitchen layout:

1. Galley kitchen

A galley-style layout, with kitchen components along one side of the campervan, is a common and space-efficient design. It provides a linear workspace with storage above and below.

The signature


2. L-shaped kitchen

Create an L-shaped kitchen layout with the countertop extending along two adjacent walls. This design can offer more counter space and storage options.

3. U-shaped kitchen

A U-shaped kitchen layout for larger campervans can provide ample counter space and storage. It allows for a more spacious and organised cooking area. However, it isn’t a common layout as campervans already have limited space.

4. Pull-out kitchen

Ideal for outdoor cooking, a pull-out kitchen accessible from outside the campervan. It can include a slide-out stove, sink, and storage compartments, allowing you to cook outdoors.

5. Convertible kitchen-dining area

This layout involves a multi-functional space that can serve as a kitchen and a dining area. Foldable tables and convertible furniture allow you to transition between cooking and dining.

6. Centre island kitchen:

A centre island layout features a standalone countertop or kitchen island in the middle of the campervan. This design provides extra workspace and can serve as a focal point in the kitchen.

7. Compact kitchen pod

Some campervans use a modular kitchen pod, a self-contained unit that is easy to install and remove. These pods often include a compact sink, stove, and storage, providing flexibility in campervan design.

8. Slide-out kitchenette

Like a pull-out kitchen, a slide-out kitchenette extends a part of the campervan’s interior to reveal an equipped kitchen. This design helps maximise interior space when parked.

9. Bed-to-kitchen conversion:

In some campervans, you can convert the bed area into a kitchen by using a foldable or convertible design. This allows for a dual-purpose use of space.

10. Rear kitchen:

Placing the kitchen at the rear of the campervan is another option. This layout can provide easy access to the kitchen when the rear doors are open, creating an indoor-outdoor cooking experience.

11. Front kitchen:

In certain campervans, the kitchen is at the front near the driver’s area. This design may be suitable for those who prefer the kitchen closer to the entrance.

12. Compact kitchen with built-in storage:

A small, compact kitchen layout with built-in storage solutions, such as hidden compartments and foldable elements, helps maintain a clutter-free and organised space.

When choosing a campervan kitchen layout, consider your cooking habits, the number of people using the space, and the design of your campervan. Customisation based on your specific needs and preferences is key to creating a functional and enjoyable kitchen space in your campervan.


How to build a safe kitchen

Ensuring safety in your campervan kitchen is crucial to prevent accidents and create a secure environment, especially when dealing with cooking appliances and potential fire hazards. Here are some safety tips for a campervan kitchen:

Fire safety:

  • Install a fire extinguisher in an easy-to-access location and ensure you check and service it regularly.
  • Use flame-resistant materials for your campervan’s interior.
  • Keep a safe distance between cooking appliances and combustible materials.

Ventilation:

  • Install proper ventilation to minimise the risk of carbon monoxide buildup, especially if using a gas stove. Ventilation can also help remove cooking odours.
  • Be cautious when cooking inside the campervan, and ensure adequate airflow.

Gas safety:

  • If using a gas stove or other gas appliances, ensure the gas system is professionally installed and checked for leaks regularly.
  • Turn off the gas supply when not using the appliances.

Electrical safety:

  • If using electrical appliances, ensure the campervan’s electrical system is professionally installed and complies with safety standards.
  • Regularly inspect and maintain electrical components to avoid the risk of short circuits or electrical fires.

Secure appliances:

  • Secure appliances during travel to stop them from falling or causing damage.
  • Ensure that any portable cooking devices are stable and placed on a flat surface.

Cook with caution:

  • Be cautious when cooking with hot surfaces and open flames.
  • Use pot holders, oven mitts, and other protective gear to avoid burns.

Proper storage:

  • Secure all items in cabinets and storage areas to prevent them from falling during travel.
  • Store sharp objects safely to avoid injuries.

Water safety:

  • If your campervan has a water system, check for leaks regularly.
  • Secure water containers and ensure you seal them to prevent spills.

Emergency exit:

  • Know the location of emergency exits and practice evacuation procedures.
  • Keep pathways clear to facilitate a quick exit in case of an emergency.

Regular maintenance:

  • Conduct regular maintenance checks on all kitchen appliances, gas systems, and electrical components.
  • Address any issues promptly to prevent safety hazards.

First aid kit:

  • Keep a well-equipped first aid kit in your campervan, including items like bandages, antiseptic wipes, and burn ointment.

Carbon monoxide detector:

  • Install a carbon monoxide detector in the campervan, especially if you use gas appliances.

Follow the manufacturer’s instructions:

  • Adhere to the manufacturer’s guidelines and instructions for all appliances and equipment in your campervan kitchen.

Prioritising safety and taking necessary precautions means you can enjoy a secure and comfortable campervan kitchen experience. Regular inspections and responsible use of equipment are crucial to maintaining a safe environment on the road.

Blog: How to keep your campervan safe


Should I build a campervan kitchen myself or use a professional?


Whether you build a campervan kitchen or hire a professional depends on various factors, including your skills, time, budget, and desired outcome. Here are some considerations to help you make a decision:

Skills and experience:

  • DIY skills: If you have experience with carpentry, electrical work, and plumbing, you may feel confident in building a campervan kitchen yourself. DIY projects can be rewarding and cost-effective if you have the necessary skills.
  • Lack of skills: If you lack the required skills, especially in areas like electrical wiring or plumbing, hiring a professional may be a safer option to ensure a functional and safe campervan kitchen.

Time commitment:

  • DIY time: Building a campervan kitchen can be time-consuming. Consider whether you have the time to dedicate to the project, including planning, sourcing materials, and completing the construction.
  • Professional time: Hiring a professional may save you time, as they will have the expertise and tools to do the job efficiently. You can still contribute to the planning and decision-making process.

Budget:

  • DIY cost: Building your campervan kitchen can be more budget-friendly, especially if you can repurpose materials or find affordable options for fixtures and appliances.
  • Professional cost: Hiring a professional will likely incur labour costs, but you may benefit from their expertise in choosing quality materials and ensuring a well-executed design.

Design and customisation:

  • DIY customisation: Building it yourself allows for greater customisation. You can tailor the design to fit your specific needs and preferences.
  • Professional design: Hiring a professional may result in a more polished campervan kitchen. Professionals can provide insights and ideas based on their experience.

Safety and regulations:

  • DIY safety: If you build the kitchen yourself, ensure your work complies with DVLA safety standards and regulations, especially in specialist areas like gas and electrical installations.
  • Professional compliance: Hiring a professional can provide peace of mind as they should be familiar with safety regulations and ensure that the campervan kitchen meets the necessary standards.

Resale value:

  • DIY impact: A campervan interior built by a professional may enhance the resale value compared to a DIY project, especially if the work is well-documented and meets industry standards.

Blog: Campervan conversion specialist vs DIY conversion: which one should you choose?


Beginner’s guide to campervan solar panels

If you’re going off-grid with your converted campervan you’ll need to consider how to generate power in your van when you don’t have access to an electricity source. 

One of the most common methods is installing solar panels. The main benefit of installing solar panels is that any energy you generate is free.


Should I install solar panels?

When choosing panels for your van or mobile installations consider these three main factors.

Solar panel efficiency is crucial, but the most efficient panels are often large and difficult to install. When you have van weight requirements to meet, you need to ensure your solar panels are lightweight.

If you don’t have experience installing solar panels, get panels that are easy to install. And even if you have experience, an easy install is always better than a complicated one!


What are the different types of solar panels?

We’ll start by examining various types of solar panels, comparing traditional rigid panels, semi-flexible panels, and semi-rigid walkable solar panels. We have firsthand experience with all three types, and we’ll recommend our favoured type at the end of the article.

1. Rigid solar panels

Crystalline silicon cells are common in the construction of rigid solar panels, usually referred to as conventional or crystalline solar panels. The longevity and effectiveness of these panels are well-known. 

These panels are the largest of the three, usually consisting of an aluminium frame and a glass top. When selecting stiff panels, keep the following points in mind: 

Construction and Durability

The strong frame of rigid panels, which is often composed of aluminium, gives the solar cells structural support and protection.

Fixed panels are more resilient and less vulnerable to damage from outside sources like hail or debris because of their sturdy build.

Efficiency

Opposed to their flexible counterparts, rigid panels may convert more sunlight into electricity because of greater efficiency rates.

Greater efficiency qualifies them for installations on rooftops or open fields, for example, when space is not an issue.

Installation

In traditional solar installations, rigid panels are often installed on tracking systems or stationary structures.

Installing a van build or mobile application can be more challenging because you have to fasten the heavy panel correctly. The most effective method is with a roof rack, which may get pricey quickly.

Weight and size

The weight and bulkiness of rigid panels compared to their flexible counterparts can affect the load-bearing capability of structures and the cost of transportation.

2. Semi-flexible solar panels

Conversely, semi-flexible solar panels are more surface-adaptable. They can be installed on a vehicle roof easily and with less drag because they can be installed nearly flat. Here are some important things to take into account while using semi-flexible solar panels, as they do have some disadvantages:

Flexibility

Thin-film solar cells create semi-flexible panels, which have some bending flexibility. They are appropriate for installations requiring flexibility or curved surfaces. A curved van roof like a Sprinter, Transit, or Promaster provides a rare opportunity to install your solar panels with almost no extra height added.

The drawback is that the panels will deteriorate over time more quickly the more twisted they are. As a result, more care may be needed during installation to guarantee that the panels are not bent excessively, which could damage their effectiveness.

Weight

Semi-flexible panels are substantially lighter than rigid panels, making them more appropriate for automotive applications where weight is a consideration. You might be surprised to learn that every van on the market has ratings for general weight and roof capacity!

Durability

Semi-flexible panels can tolerate bending, but over time, especially in severe environments, they could be more prone to wear and tear than rigid panels.

Efficiency

Although flexible solar panels offer numerous advantages, one of the biggest drawbacks is their efficiency compared to rigid solar panels.

3. Semi-rigid walkable solar panels

Walkable, semi-rigid solar panels are last but most definitely not least. These panels are our top choice for versatile, simple-to-install solar power. When it comes to semi-rigid panels, keep the following in mind:

Flexibility/Size

While semi-rigid panels can bend, they do so considerably less so than semi-flexible panels. These panels can be fitted to the shape of a van roof; however, they will not work with any angle more dramatic than a few degrees.

Because of the aluminium backing panel, they have a 1/4-inch thickness. Because of this, they are also marginally heavier than flexible solar panels, but they are still far lighter and easier to handle than rigid solar panels. The profile from the side is low because they are so thin. Opposed to a hard panel, they keep your van less detectable.

Efficiency 

Under the right circumstances, semi-rigid solar panels can be effective compared to rigid and semi-flexible panels. In terms of effectiveness, they fall in the middle of the two other possibilities, but they ultimately resemble rigid panels more than semi-flexible ones.

Installation

The simplicity of installation is arguably one of the best aspects of these panels. You can purchase a C channel and VHB tape it to the van roof. Installing solar panels on a van roof requires no metal, screws, or complicated roof racks. Furthermore, they are simple to swap out!

Durability

Durability is another advantage of semi-rigid panels versus semi-flexible panels. These panels are very sturdy and are resistant to cracking and premature ageing.

Price

These panels are by far the priciest. However, when you add the decking, roof rack, and other materials to the price, you could save yourself money.


How to wire solar panels in a campervan

If your array consists of more than one panel, your next thought after selecting the panels will be how to wire them. There are three methods for connecting several solar panels: parallel, series and parallel series.

1. Parallel

A parallel is a branch that joins the positive and negative sides into separate lines. It’s arguably the simplest and might be what you have observed other people doing with their builds. However, that does not imply that it is the ideal configuration. 

The primary drawback of this approach is that adding more panels will cause the amperage to rise gradually, based on the panels’ capacities. To retain the correct ampacity, you will need to make the appropriate wiring adjustments. 

2. Series wiring

On the other hand, series wiring gradually raises voltage over amperage, allowing the solar wiring to carry fewer amps while still producing the same amount of power. One huge panel with a single negative and single positive on either side of the solar array is created by series wiring, which is achieved by connecting the positive of one panel to the negative of another.

The drawback of series wiring is that, since you are effectively building one big panel, any shading of one of your panels will impact the entire array, causing a reduction in efficiency. This approach requires an MPPT-compatible charge controller as well, depending on the number of panels in the series.

3. Series-parallel

The last kind of solar wiring is termed series-parallel. As there isn’t much room for panels on van roofs, this type of wiring suits larger solar arrays. The positive and negative of half the panels connect in series for this sort of wiring, which requires an even number of panels. Both series branch together in parallel. Age and amperage are both increased with this system. However, if one solar panel is shaded, the shading power loss will only occur across half of the system.


Saving money with wiring

You can see how different wiring methods might impact the total amount of wiring in a given configuration. In electrical installations, wiring is sometimes one of the most costly and neglected components. You could save a tonne of money just by deciding to wire your solar panels differently!


Which campervan solar panels should you pick?

The Semi-Ridgid panels take the win! Each of these panels has different pros and cons, and other applications may be better for your van.

Stay away from the semi-flexible panels altogether. While they are cheap and seem appealing for all different mounting applications, their efficiency and longevity are questionable.

The best application for semi-flexible panels is an additional array that you can hang or plug in, but that isn’t permanently mounted to your vehicle.

For mounting panels, we recommend that you do not drill holes directly into the roof since it will inevitably become a failure point where water and debris can enter the vehicle. Instead, use a roof rack or VHB tape, or we have even heard of some applications that use extremely strong magnets to attach solar panels (we have never tested this ourselves). 

This is again one of our reasons for choosing the semi-rigid panels since the installation is fairly minimal and requires no drilling or compromising of the vehicle roof.

We hope this guide leaves you with a better idea of how to pick solar panels and wire a van. And if you need any advice, we can help you!


8 reasons campervans will be popular in 2024

People have been ditching the traditional way of living and going on holiday for years, and living in a campervan is one of the options people pick.

In 2021, Motor Connect reported an estimated 225,000 campervans and motorhomes were on the road in the UK. They also estimated that around 4000 of these vehicles are sold every year.

But are campervans still going to be popular in 2024? The answer is yes! Here’s why we know people will still be buying and using campervans in 2024.


1. The ‘Van Life’ movement continues to rise in popularity

The Van Life movement mainly consists of young outdoor enthusiasts who want the freedom to travel while living a more basic, wholesome lifestyle. It’s like being on a permanent holiday!

The Van Life community is inclusive and promotes responsible living, sustainability, and practical, minimal living conditions. And most importantly, Van Lifers create unforgettable memories and experiences that will stay with them forever.

Campervans are cheaper when compared to traditional living methods like owning or renting a house. While a new campervan or motorhome can cost £50-60,000 upwards, a converted van can cost as little as £10,000. Although it’s wise to spend more if living in the vehicle is the end goal.


2. Staycations are here to stay!

The rise in the popularity of staycations during the pandemic made people realise there’s plenty of beauty and adventure to experience in the UK, and driving a van into mainland Europe isn’t out of the question with proper cover.

Staycations allow campervan owners to reduce the cost of their holidays, cut out long journeys, meet up with friends and family, avoid any animal care and have more flexibility over the time of the holiday.


3. Working from home takes on a new form

Factor in that most people can now work remotely with a stable internet connection, and living out of a van doesn’t sound as daunting as it would have done before the pandemic hit the UK.

Most people can use a dongle to get a decent connection as long as they aren’t in the middle of nowhere, and most can perform most tasks that require a connection.


4. It’s a potential income stream

While most people own a campervan to use it themselves, some people rent out their van to other campers. Hiring a van is also a great way to get a taster, whether buying for conversion or a holiday.

A van can get £100+ a night, but that requires a regular stream of customers to make a living. Even renting it out now and again is some extra cash. However, there are costs like insurance, commission fees from rental sites and damage and repairs.


5. Campervans can hold their value

Not every campervan will hold its value, but if a van is well-maintained, there’s a good chance it will resell. Vintage and modified campervans are particularly well-known for holding value as they often have a personal touch that most vehicles don’t. It’s even possible to make a profit on a campervan.

Increasing the value of a campervan requires regular maintenance and updates to all parts of the van. It also pays to focus on amenities like solar panels, coffee machines, roof vents and TVs while avoiding gimmicks. Wasted space is a true crime in the campervan world!


6. They look cool!

While the look of a campervan should never be the only reason for buying, it does play a (huge) part. While VW Camper created the epitome of campervan cool, people are customising all types of vans in 2023, and the results are astounding.

Who wouldn’t feel cool driving around in their own compact mobile home? The level of customisation achievable with a converted camper is endless, and people are coming up with new modifications every day. New models look great, although they come at a premium price.


7. Doubles as an everyday vehicle

While a motorhome isn’t for everyday driving, campervans are different, especially converted vans. Converted vans served a purpose before they became campervans, usually, a mixture of motorway, city, town and country driving.

It makes them ideal for use as an everyday vehicle as they’re suited to all-terrain and they’re a lot easier to manoeuvre than a motorhome. While they’re bigger than most cars and will take more fuel, it’s a cheaper option than having an extra car.


8. There are plenty of ways to buy

There are plenty of ways to buy a campervan, such as buying a new van, buying a secondhand van or converting a van. Each method comes with its pros, cons and price point.

Buying new is the most expensive, but buying options will usually be flexible, and the van will have the most longevity. Buying a second-hand van is the cheapest way to get on the road, and vans sell for as little as £10,000. 

The middle-of-the-road option is converting a van. Van conversions are usually done by a specialist. And for a decent conversion, it’ll cost about £20,000 (not including the cost of the van). Van conversions are popular among Van Lifers as they offer customisation options.


Are you ready to join the campervan community in 2024?

If you’re thinking of owning a campervan in 2024, a great decision. However, there’s a long way to go yet. Firstly, you need to decide what type of campervan you need. Read the following blogs to determine what type of campervan is best for your budget and lifestyle.


Campervan conversion vs buying a van

Campervan conversion specialist vs DIY conversion

loch ness

Wild Camping in a campervan: Scotland’s top 10 locations

Scotland’s untamed landscapes, rugged mountains, and pristine lochs make it a paradise for wild camping enthusiasts. With its legal right to roam, Scotland offers a wealth of breathtaking spots to park your campervan and immerse yourself in nature’s embrace.

In this blog post, we will guide you through the 10 best wild camping spots in Scotland, where you can experience the sheer beauty and tranquillity of the country while enjoying the comfort and freedom of your campervan


Glen Etive

Located in the Highlands, Glen Etive is a true gem for wild campers. With its winding single-track road and magnificent views of Ben Starav and Buachaille Etive Mor, it offers a picturesque setting for campervan adventurers.

Pitch your campervan along the banks of the River Etive and wake up to the sounds of rushing water and chirping birds. Be sure to explore the nearby hidden waterfalls and enjoy scenic hikes through the glen.


Loch Lomond

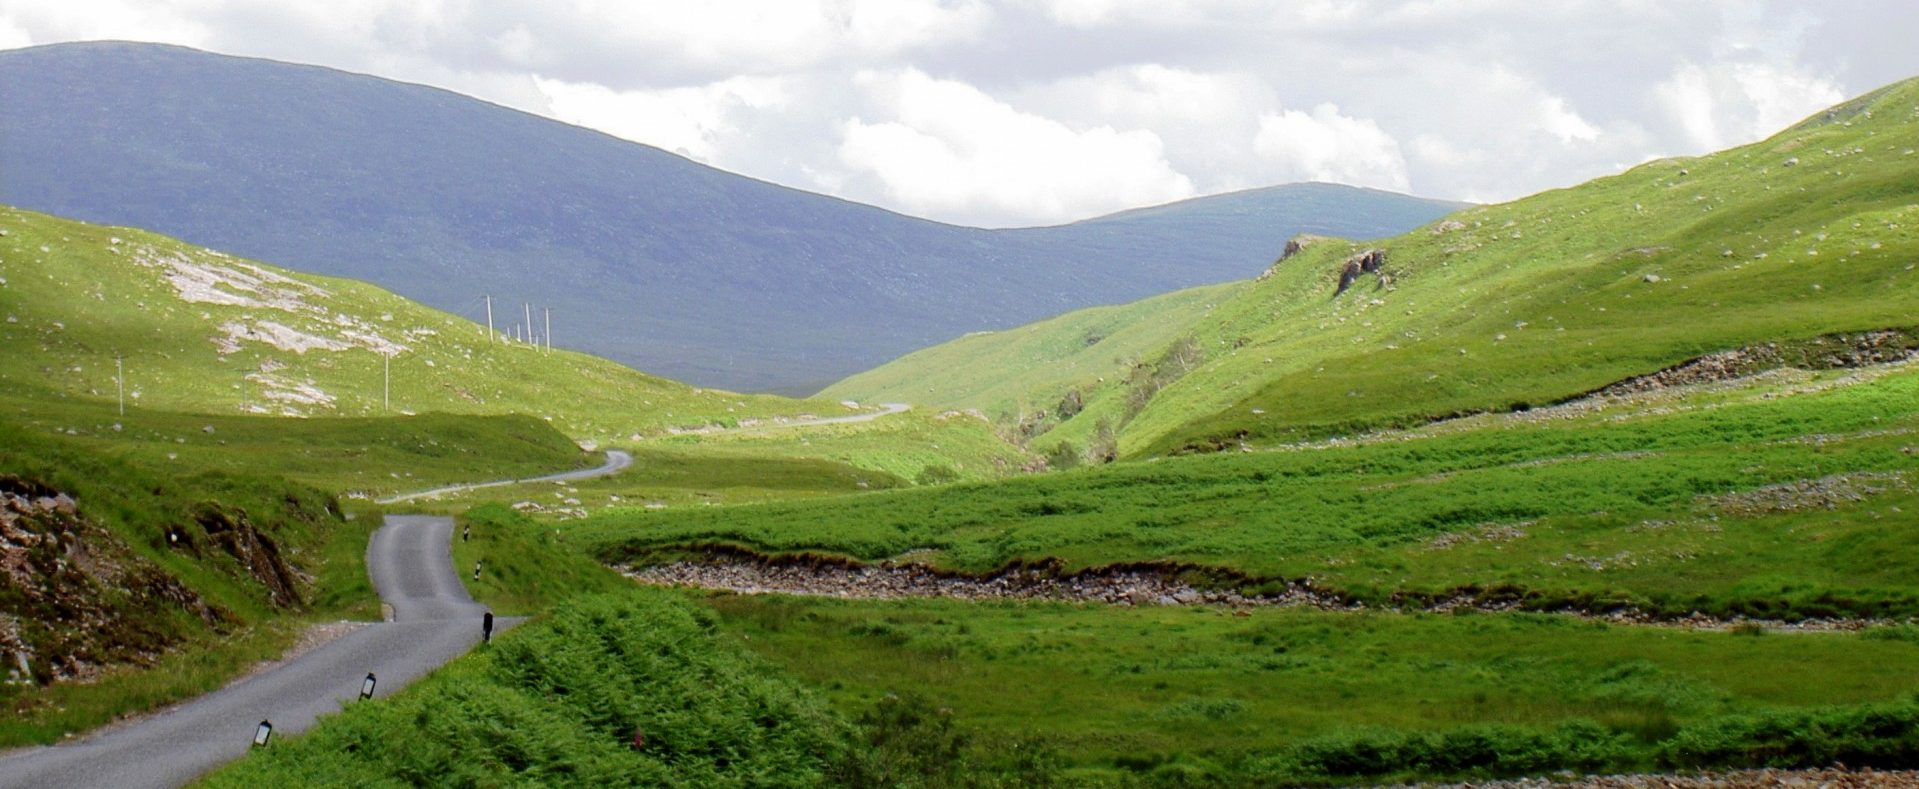
Loch Lomond and its surrounding Trossachs National Park are a paradise for nature lovers. The eastern shore of Loch Lomond offers several wild camping spots, such as Sallochy Bay and Cashel Campsite.

Park your campervan near the water’s edge and enjoy stunning sunsets, tranquil boat rides, and invigorating hikes along the loch.


Assynt

Situated in the northwest Highlands, Assynt is famous for its dramatic mountain peaks, including Suilven and Quinag.

Campervan enthusiasts can find several wild camping spots along Loch Assynt, such as Ardvreck Castle and Clachtoll Beach. Immerse yourself in the remote and rugged beauty of the area, surrounded by ancient landscapes and breathtaking vistas.


Isle of Skye

The Isle of Skye captivates visitors with its otherworldly landscapes and mystical charm. Wild campers in campervans will find enchanting spots like the Fairy Pools in Glen Brittle or the Quiraing, offering sweeping views of cliffs and rock formations.

Wake up to the Isle of Skye’s ethereal beauty and explore its many hiking trails, hidden waterfalls, and captivating fairy-tale scenery.


Glen Coe

Glen Coe is a glacial valley in the Highlands renowned for its dramatic peaks and stunning vistas. Campervan enthusiasts can find wild camping spots along the A82, with breathtaking views of Buachaille Etive Mor and the Three Sisters.

Witness the ever-changing light play on the rugged landscapes and explore the numerous hiking trails that meander through this iconic Scottish glen.


Sandwood Bay

For those seeking a remote and untouched coastal camping experience, Sandwood Bay in Sutherland is a must-visit.

Accessible via a four-mile hike from the nearest car park, this pristine beach rewards campervan adventurers with its vast stretches of golden sand and dramatic sea stacks.

Spend your day beachcombing, exploring the sea caves, and revelling in the tranquillity of this secluded paradise.


Loch Morlich

Nestled in the Cairngorms National Park, Loch Morlich is a stunning freshwater loch surrounded by pine forests and mountain peaks.

Campervan travellers can park near the loch and enjoy its pristine beauty, with opportunities for water sports, hiking, and simply basking in the tranquillity of nature.

The nearby Cairngorm Mountain offers breathtaking views and hiking trails for those seeking further adventure.


Loch Ness

Known worldwide for its mythical monster, Loch Ness also offers wild camping opportunities along its scenic shores.

Park your campervan near the loch and soak in the mystique of this famous waterbody. Explore the ruins of Urquhart Castle, take a boat tour to search for Nessie, and enjoy the peacefulness of the surrounding Scottish Highlands.


Glen Affric

Glen Affric, often referred to as the most beautiful glen in Scotland, is a haven for wild camping enthusiasts.

Campervans can park near the glen, surrounded by ancient Caledonian pine forests and pristine lochs.

Enjoy leisurely walks, hike the Affric Kintail Way, and revel in the serenity of this untouched wilderness.


Lochaber

Lochaber, also known as the Outdoor Capital of the UK, offers an abundance of wild camping opportunities.

From the iconic Ben Nevis, the highest mountain in the British Isles, to the stunning Glencoe Valley, campervan adventurers will find breathtaking spots to park amidst the awe-inspiring scenery.

Explore the Jacobite Steam Train, hike along the West Highland Way, or simply enjoy the tranquillity of Lochaber’s natural wonders.


Pack up and embrace the freedom of Scotland

Scotland’s wild camping spots provide campervan adventurers with an unparalleled opportunity to immerse themselves in the country’s untamed beauty.

Whether it’s the majestic glens of Glen Coe and Glen Etive, the mystical allure of the Isle of Skye, or the remote coastal charm of Sandwood Bay, each destination offers its own unique experience.

As you embark on your wild camping journey, remember to respect the environment, follow local regulations, and leave no trace.

So, pack your campervan, embrace the freedom of the road, and discover the 10 best wild camping spots in Scotland that will leave you with memories to last a lifetime.

most reliable vans to convert into a campervan

10 campervan conversion mistakes to avoid

Converting a campervan is a massive job, especially if you don’t have any experience. While nothing compares to the feeling of accomplishment after converting a van yourself, there are plenty of mistakes you can make and problems you can encounter.

Mistakes and problems can set your build back months or even derail your conversion completely. In this blog, we look at some common campervan conversion mistakes and alternative van conversion options that can shorten your build time and help you avoid costly errors.


1. Assuming you can do everything yourself

The first campervan conversion mistake people make is thinking they can do everything themselves. Even the most experienced converters may rely on outsourcing some of the work. 

For example, gas and electricity are critical to the van’s operation, so getting them wrong can mean your vehicle doesn’t operate well enough to be on the road. Also, getting your gas and electrics wrong can be dangerous, and you don’t want to put yourself, your loved ones or potential renters in a treacherous situation.

Solution: think carefully about your skillset and what you can do yourself. And if you aren’t 100% sure you can execute the task to ensure the van’s operational use and safety, look for someone who can.

Campervan conversion specialist vs DIY conversion: which one should you pick?


2. Rushing your van purchase

If you rush into buying a van, you can buy the wrong one. While every converter is keen to get on the road, it’s always better to consider what van suits your lifestyle and budget.

If you rush into a purchase and spend £15,000 on a van you can’t use, you may have to knock some money off the resale price, diminishing your budget and putting your project on hold.

Solution: conduct extensive research into the van you require, and take someone along to get a second opinion when you view a van. If you don’t feel comfortable buying a van, converters like the team at Bhode Vans can help you get the right van for your conversion.

5 best large vans to convert into a campervan

10 most reliable vans to convert into a campervan


3. Not inspecting the van

If you’ve got the right van for your conversion, you want it to live up to your expectations. While we always advise reading reviews and asking other campers about their experience with a vehicle, every campervan is different, and reviews can only tell you so much.

Not inspecting the van can leave you open to faults you could have spotted earlier, meaning you may have to do more work to the vehicle before you can begin your conversion. 

Solution: If you know a mechanic, take one along to your viewing. A mechanic will have inside knowledge of potential faults, and they can check paperwork to ensure the van is in working order. If you don’t know a mechanic, consider using a converter to source your van.


4. Not addressing dampness

Like rust, dampness can ruin your conversion and leave you with a useless van or a hefty bill to make your van liveable. Much like rust, people tend to ignore dampness. Most people don’t want to deal with it in their homes!

Plus, having damp in your van will ruin the experience you sought when deciding to convert a van. Nobody wants to sit or sleep in a wet, cold van that can damage your experience and health.

Solution: consider the airflow in your van, and use air vents and other equipment like heaters to keep fresh air circulating and your van warm.


5. Missing or ignoring rust

Any vehicle owner will be aware that rust is a huge problem. Vans spend plenty of time on the road in various weather conditions, making them more prone to rust. Vans also travel on uneven ground more than cars, meaning they’re more likely to pick up unwanted debris. 

It’s also worth considering that most vans won’t have been the pride and joy of the owner’s life. They usually have a service purpose and won’t get the treatment of a classic car. Unless it’s part of a large company fleet, when do you ever see a pristine service van?

Checking and dealing with rust is even more vital when converting a van. You could do plenty of work to the vehicle only to find out you need to dismantle what you’ve done to deal with rust issues. Rust can even stop your project altogether if it’s serious, which is devastating.

Solution: check. And double-check. Ask someone else to check. If you’re unsure, hire a professional, as they know what to look for.


6. Mismanaging your budget

While it may seem simple, poor budgeting is one of the most common campervan conversion mistakes people make when converting a van. Converting a van for the first time can lead to numerous cost obstacles that could hinder your journey.

Mismanaging your budget can delay your time to get on the road or lead you to take out finance agreements or loans to cover any unexpected costs. While it’s hard to stick to an exact budget, ensure your costs don’t spiral and derail your project.

Solution: Give yourself an emergency fund. If you have £20,000 to spend on your conversion, use £15,000 as your budget. If you incur any unexpected costs, you have a safety buffer. Alternatively, you can work with a converter who will understand how to utilise your budget and may have standardised packages with a fixed fee.

How much does a campervan conversion cost?


7. Using poor tools and materials

Buying and using poor tools can affect the quality of your build. If you use substandard materials, the life of your van could decline, and you may end up redoing the work you planned to do once.

Using poor tools and materials can also affect your budget, as buying cheap and expecting results can often lead to spending double what you originally planned.

Solution: While everyone wants a good deal on materials and tools, don’t cut corners and expect results. You’re using the van, so you want the experience to be as pleasurable as possible. And if you aren’t sure how to save money and get the best tools and materials, ask an experienced professional.


8. Not meeting DVLA criteria

The worst feeling in the world is getting your dream van to discover you can’t drive it! You’re left looking at the camper you’re supposed to enjoy while reversing the process and spending more time and money to make the van road-legal.

While nothing is stopping you from converting a van into a camper van, there are specific requirements your van must meet for it to be roadworthy, such as the van’s internal and external features.

Solution: always make any changes with DVLA criteria in mind, and if you aren’t sure if you can make the change, check with the DVLA or someone who has experience making campervans roadworthy.

DVLA requirements for van conversion: How to make your van road-legal


9. Not understanding the best layout

Many factors affect the best layout for a van, such as the type of van you choose, your sleeping arrangements, water and gas storage, general storage and seat and table positioning. 

And there isn’t a one-size-fits-all approach to determining your layout unless you have experience with a particular van. Even converters customise their standardised builds to suit a customer’s needs.

Picking the correct layout is one of the most stressful parts of converting your van, and you’ll probably change your mind a few times! The good thing about the format is that it can be changed if you make a mistake or have to reconsider something, but it will come at a cost. And if you’re on a budget, you’ll want to ensure you get it right the first time.

Determine your van layout by your lifestyle. What’s important to you may not be to another campervan owner. You’ll need to consider plenty of lifestyle factors, such as how you will use the van, how much you cook and the climate of the areas you’ll be travelling to.

Solution: Stick an airbed in your van and go travelling. Travelling in your van will give you an idea of what you need and what to leave out. You could also rent a pre-built version of the vehicle you intend to purchase and look at the strengths and weaknesses. You may end up buying a different van! And speak to people who have converted a van at gatherings, forums and Facebook groups.


10. Not considering alternatives

While you may have your heart set on a DIY campervan conversion, it might not be the best way to get the van of your dreams. As we’ve discussed, there are plenty of pitfalls when converting a van yourself, and it can be easier to take the stress away and choose a quicker alternative.

Buying a pre-built van is the quickest way to get on the road. You can buy a second-hand van conversion or buy a new van. Buying a new van is expensive, and you could spend upwards of £50,000. 

Buying a second-hand van is cheaper, with plenty of great deals on the market. You won’t have the sense of achievement you get with converting a van, but you can always use the van for a couple of years before you start a build.

You can also use a converter. A conversion is a happy medium between doing it yourself and buying a pre-built van. You still get to retain some creative control and add personal touches while taking away the stress and time of building the van yourself. Basic builds usually start at £15-20k and aren’t as expensive as buying a new van.

Solution: consider all your options and pick the one that suits you. Sometimes, what you want isn’t what you need, and converting a van yourself is never off the table.


Need more conversion advice? Get in touch!

Bhode Vans has been converting vans since 2019, so we know a thing or two about the best options. Plus, we’ll only recommend the build we think is right for you, whether converting a van yourself or using our van conversion service. Avoid these campervan conversion mistakes and see how we can help you build your dream van.

Devon & Cornwall Campervan Guide: 14 Day Itinerary

Roaming the South West: Planning a campervan adventure in Devon and Cornwall

Devon and Cornwall, nestled in the southwestern corner of England, are a treasure trove of breathtaking landscapes, rugged coastlines, and rich history. A campervan trip through these picturesque counties promises an unforgettable adventure.

In this itinerary, we’ll guide you through the must-visit destinations and activities for an incredible campervan holiday. Whether you have two weeks or two months, Devon and Cornwall await your exploration. So, rev up your campervan, pack your bags, and let’s embark on an epic journey through these stunning regions.


Devon and Cornwall Campervan Itinerary
Arrival in Exeter, Devon

Begin your adventure in Exeter, the capital of Devon. Explore the historic Exeter Cathedral and take a stroll along the picturesque Quayside. It’s also a great time to stock up on supplies for your campervan journey.


Dartmoor National Park

Head west to Dartmoor National Park, a haven for outdoor enthusiasts. Hike through the dramatic landscapes, visit ancient stone circles, and don’t forget to spot the famous Dartmoor ponies. Camping options are available within the park for an authentic campervan experience.


North Devon Coast

Drive north to the North Devon Coast and explore charming coastal towns like Ilfracombe and Woolacombe. Soak up the sun on the sandy beaches, try your hand at water sports, and savour a delicious seafood meal at a local seaside restaurant.


Cornwall’s North Coast

Cross the border into Cornwall and make your way to the stunning North Cornwall coast. Discover the iconic Tintagel Castle, perched on rugged cliffs, and explore the picturesque village of Port Isaac, famous for its appearance in the TV series “Doc Martin.”


Newquay and the Surfing Scene

Head to Newquay, known as the surf capital of the UK. Whether you’re an experienced surfer or a beginner, you can take lessons and ride the waves at one of Newquay’s beautiful beaches.


St. Ives and the Tate Gallery

Drive to St. Ives, a picturesque town known for its artistic heritage. Visit the Tate St. Ives art gallery, explore the narrow streets of galleries and boutiques, and relax on the stunning Porthmeor Beach.


Penzance and the South Coast

Travel to Penzance on Cornwall’s south coast. Explore the historic town, visit the enchanting St. Michael’s Mount (accessible by foot at low tide), and take a scenic coastal drive to Land’s End, the westernmost point of England.


The Lizard Peninsula

Discover the rugged beauty of the Lizard Peninsula. Hike along the South West Coast Path, visit the famous Lizard Point lighthouse, and explore picturesque fishing villages like Coverack and Cadgwith.


Falmouth and Maritime Heritage

Drive to Falmouth, a maritime town steeped in history. Explore the National Maritime Museum, take a boat trip along the Fal River, and enjoy a waterfront meal at one of the town’s excellent restaurants.


Return to Exeter and Farewell

Conclude your campervan journey by returning to Exeter. Spend your final day revisiting any favourite spots or discovering new ones in this charming city. Reflect on the incredible memories you’ve made during your Devon and Cornwall campervan holiday.


Discover the magic of Devon and Cornwall

A campervan trip through Devon and Cornwall offers a perfect blend of natural beauty, coastal adventures, and cultural exploration.

So, embark on this epic adventure, soak in the stunning scenery, and create lasting memories on your Devon and Cornwall campervan holiday. Your campervan is your ticket to a world of exploration, and these two counties have it all.


Build your dream campervan and get on the road to the South Coast!

If you’re thinking about converting a van into a campervan, we can help get you ready to hit the road. We can even help you source a van. If you’d like to learn more about campervan conversions visit our educational blog, and if you can’t wait to get going submit an enquiry today.